本日は AzureKinectSDK の技術調査枠です。
Pythonの自作モジュール(*.pyd)をBlenderのアドオンとしてインストールする一例を記事にします。

本記事では Pythonの自作モジュールとして、以前作成した AzureKinectSDK のサンプルプログラムを利用します。
本記事の実施には、以下の前回記事の作業が前提となります。
bluebirdofoz.hatenablog.com
Blenderアドオンのスクリプトの作成
前回記事で作成した kinect_capture モジュールを利用する Blender アドオンの関数を用意します。
以下の関数登録のための __init__.py と kinect_capture モジュールを実行する module.py を作成しました。
__init__.py の名前を持つスクリプトはモジュール読み込みの際、初めに実行される Python スクリプトです。
ファイル名は必ず __init__.py である必要があります。
同ディレクトリに配置する module.py を読み込むため、システムパスの追加を行います。
・__init__.py
# bpyインポート
import bpy
# osインポート(ディレクトリ取得のため)
import os
# sysインポート(システムパス追加のため)
import sys

# 読み込み元のディレクトリパスを取得
addon_dirpath = os.path.dirname(__file__)
# 読み込み元のディレクトリパスをシステムパスに追加
sys.path += [addon_dirpath]

# moduleインポート(処理呼び出しのため)
import module

# bl_infoの設定
bl_info = {
  "name": "AzureCaptureAddOn",             # プラグイン名
  "description": "AzureCapture AddOn",     # 説明文
  "author": "holomon",                     # 制作者名
  "version": (1, 0, 0, 0),                 # バージョン
  "blender": (2, 80, 0),                   # 動作可能なBlenderバージョン
  "support": "TESTING",                    # サポートレベル
  "category": "3D View",                   # カテゴリ名
  "location": "",                          # 機能の位置付け
  "warning": "",                           # 注意点やバグ情報
  "wiki_url": "",                          # ドキュメントURL
  "tracker_url": ""                        # サポートサイトURL
}

# 登録関数
class AZUREPOINTCAPTURE_OT_capture(bpy.types.Operator):
    bl_label = "Azure Capture"
    bl_idname = "azure_capture.execute"
    bl_description = "Export PLY file"

    def execute(self, context):
        module.capture_execute()
        return{'FINISHED'}


# 登録対象のクラス名
regist_classes = (
    AZUREPOINTCAPTURE_OT_capture,
)


# AzureCaptureの登録
def register():
    for regist_cls in regist_classes:
        bpy.utils.register_class(regist_cls)

# AzureCaptureの解除
def unregister():
    for regist_cls in regist_classes:
        bpy.utils.unregister_class(regist_cls)

# 実行例:[AzureCaptureの登録]を実施
if __name__ == "__main__":
    register()
module.py は __init__.py から利用されるモジュール本体です。
__init__.py のインポート文に合わせてファイル名を設定します。
同ディレクトリに配置する kinect_capture.cp37-win_amd64.pyd を読み込むため、システムパスの追加を行います。
・__init__.py
# bpyインポート
import bpy
# osインポート(ディレクトリ取得のため)
import os
# sysインポート(システムパス追加のため)
import sys

# 読み込み元のディレクトリパスを取得
addon_dirpath = os.path.dirname(__file__)
# 読み込み元のディレクトリパスをシステムパスに追加
sys.path += [addon_dirpath]

# kinect_captureインポート(Kinect実行のため)
import kinect_capture

# 実行関数群
def capture_execute():
    """メイン関数
    """
    # PLYファイルの出力ディレクトリを取得する
    # (.blendファイルのディレクトリに出力する)
    ply_dir = get_blend_dirpath()
    # PLYファイルの出力ディレクトリが取得できなければ処理を行わない
    # (.blendファイル未保存時に本分岐に入る)
    if ply_dir == "":
        print("save .blend Project, plase")
        return
    # AzureKinect のキャプチャ実行
    execute_azure_capture(arg_exportdir = ply_dir)
    return

def get_blend_dirpath() -> str:
    """現在のblendファイルのディレクトリパスを取得する

    Returns:
        str -- blendディレクトリパス(.blend未保存時は空文字を返却する)
    """
    # blendファイルのパスを取得
    filepath = bpy.data.filepath
    # blendファイルが未保存の場合は空文字が返る
    if filepath == "":
        # 戻り値にも空文字を返す
        return ""
    # blendフォイルのディレクトリパスを取得
    dirpath = os.path.dirname(filepath)
    return dirpath

def execute_azure_capture(arg_exportdir = "") -> bool:
    """AzureCaptureモジュールの実行

    Keyword Arguments:
        arg_exportdir {str} -- PLYファイルの出力ディレクトリ (default: {""})

    Returns:
        bool -- 実行成否
    """
    # キャプチャモジュールの実行
    is_result = kinect_capture.capture(arg_exportdir)
    return is_result
Blenderアドオンのインストールファイルの作成
更に前回記事で作成した kinect_capture モジュールの pyd ファイルとライブラリ群を同ディレクトリにコピーします。
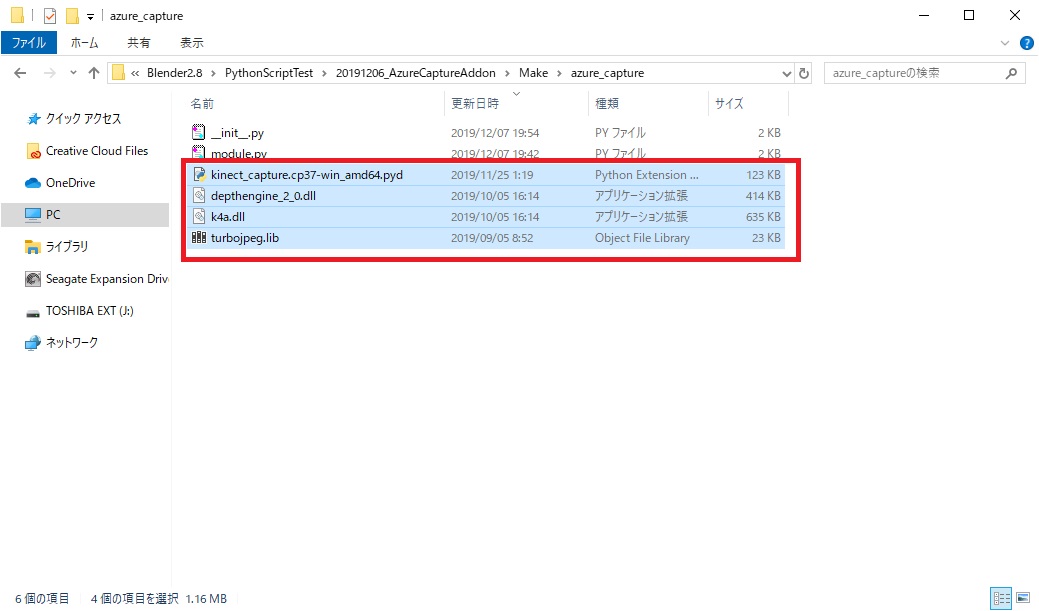
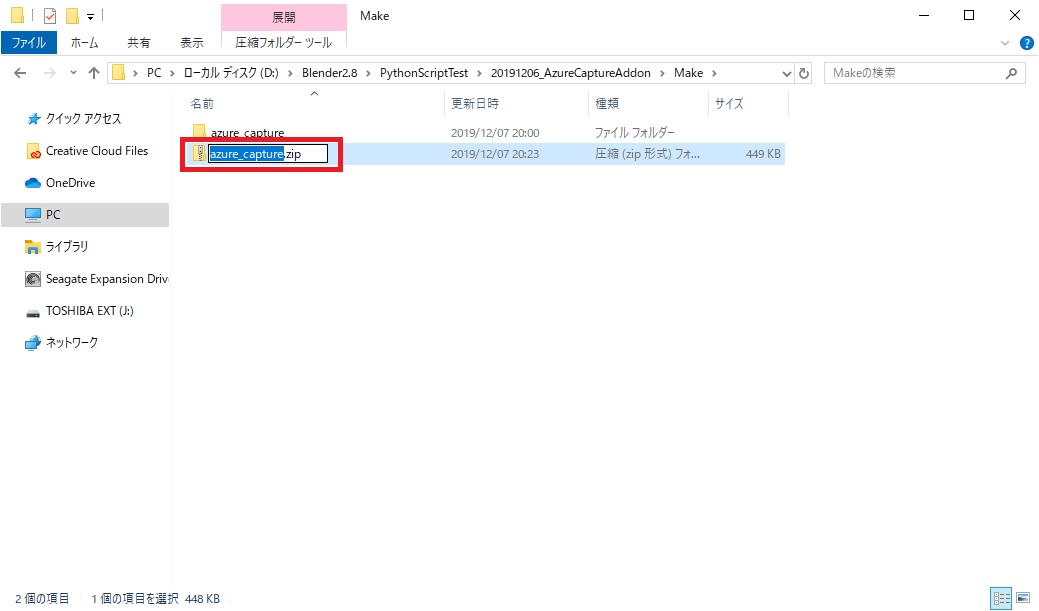
作成したディレクトリを ZIP 形式で圧縮すればアドオンのインストールファイルの完成です。
Blenderへのインストール
作成したアドオンを Blender にインストールします。
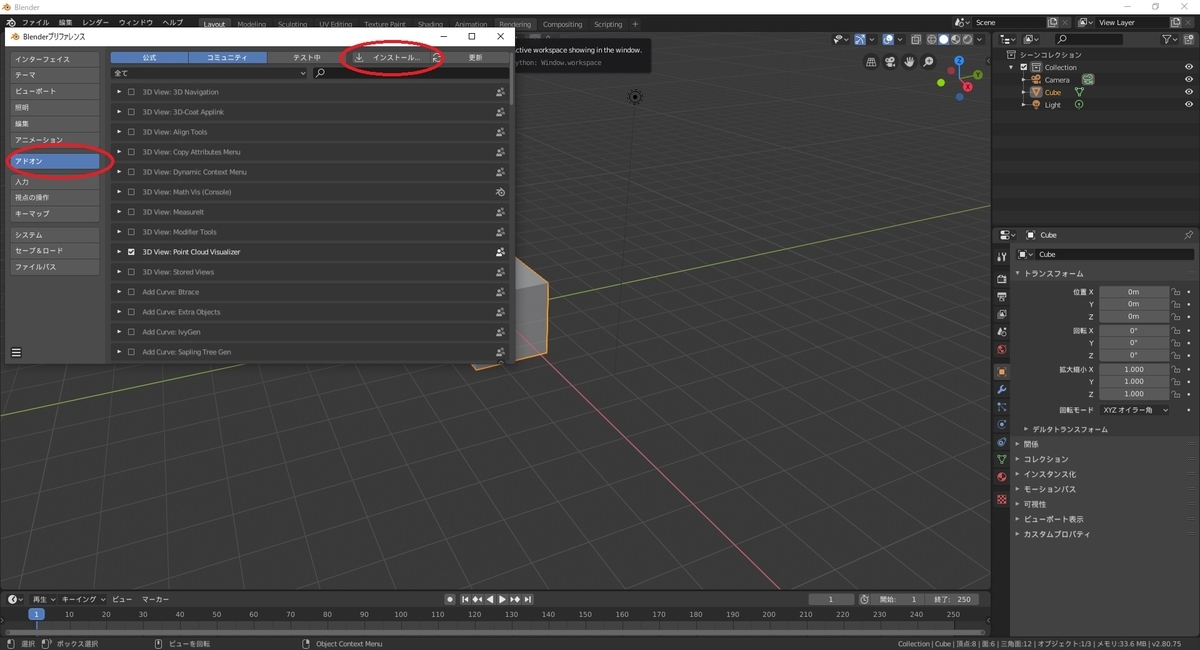
Blender 2.8 を起動し、メニューから 編集 -> プリファレンス を選択します。

Blenderプリファレンスダイアログが開きます。
[アドオン]タブを開き、[インストール]ボタンをクリックします。
ファイル選択画面が開くので、先ほど作成した圧縮ファイルを選択して[ファイルからアドオンをインストール]を実行します。
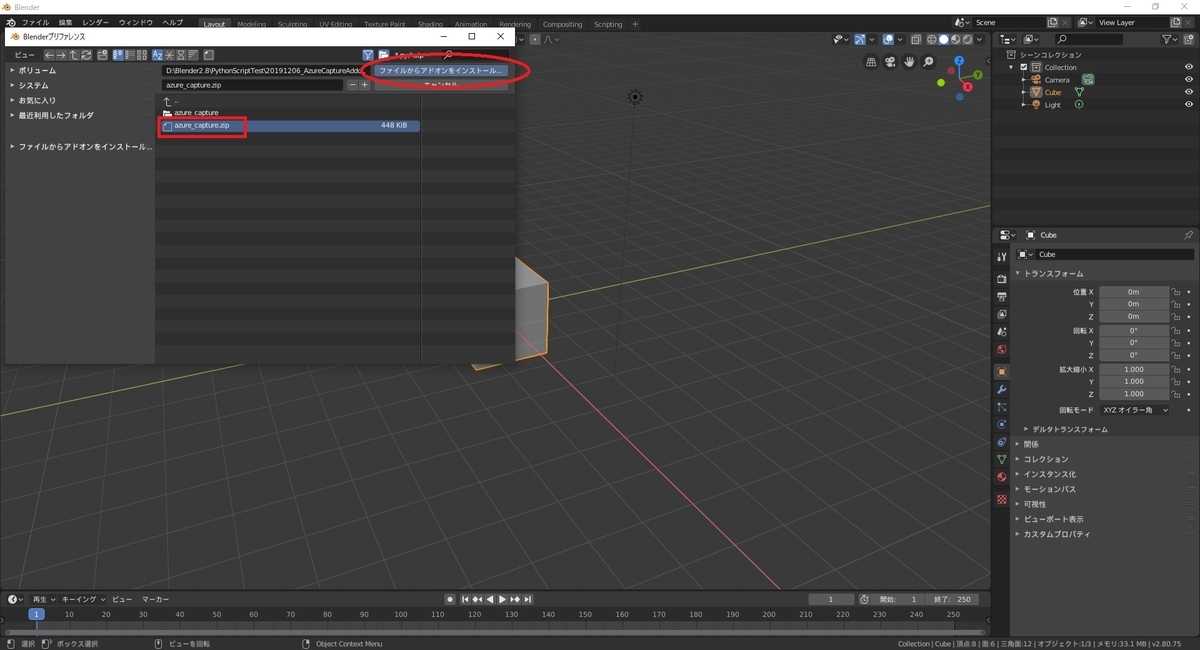
これでアドオンがインストールされました。
インストールされたアドオンは以下のディレクトリに展開されています。
C:\Users\(ユーザ名)\AppData\Roaming\Blender Foundation\Blender\(Blenderバージョン)\scripts\addons
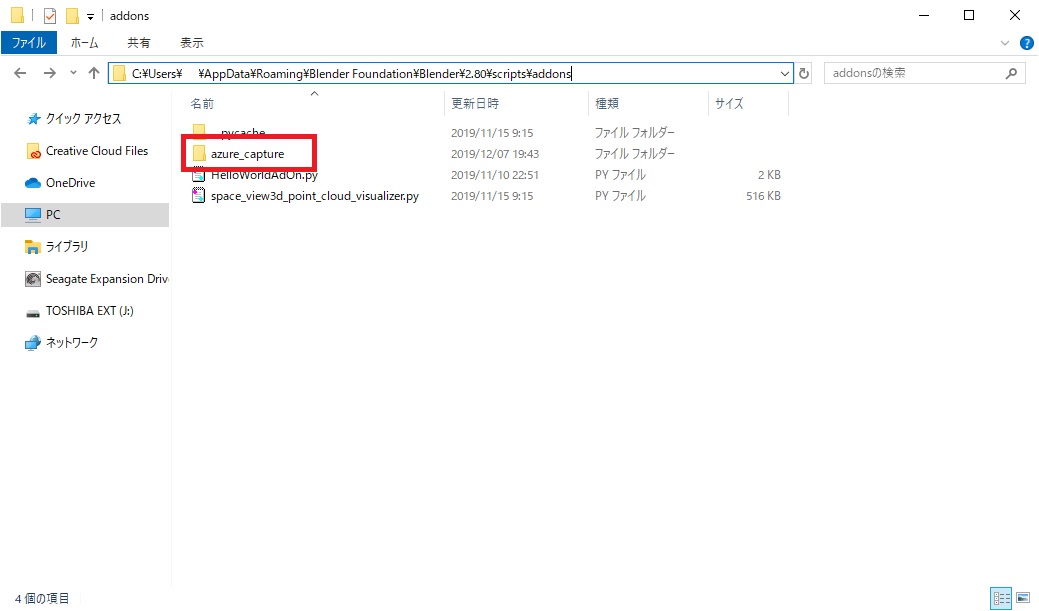
インストールしたアドオンを使うには、アドオンを有効化する必要があります。
今回のアドオンは "support" を "TESTING" にしていたので[テスト中]タブを開くと、一覧に表示されます。
アドオンのチェックボックスをチェックすると、アドオンが有効化されます。

これで kinect_capture モジュールを呼び出す関数が bl_idname の azure_capture.execute の名前で登録されました。
登録関数の確認
関数が実際に登録されているか確認します。
メニューから 編集 -> オペレーターを検索 で登録関数を探してみます。
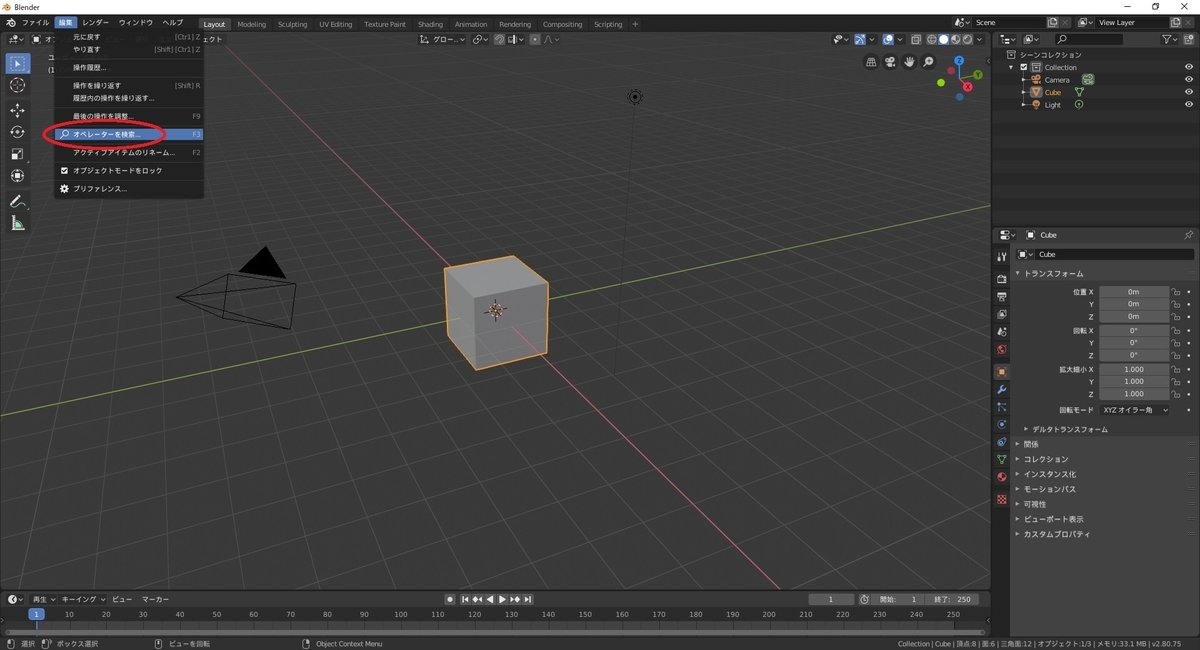
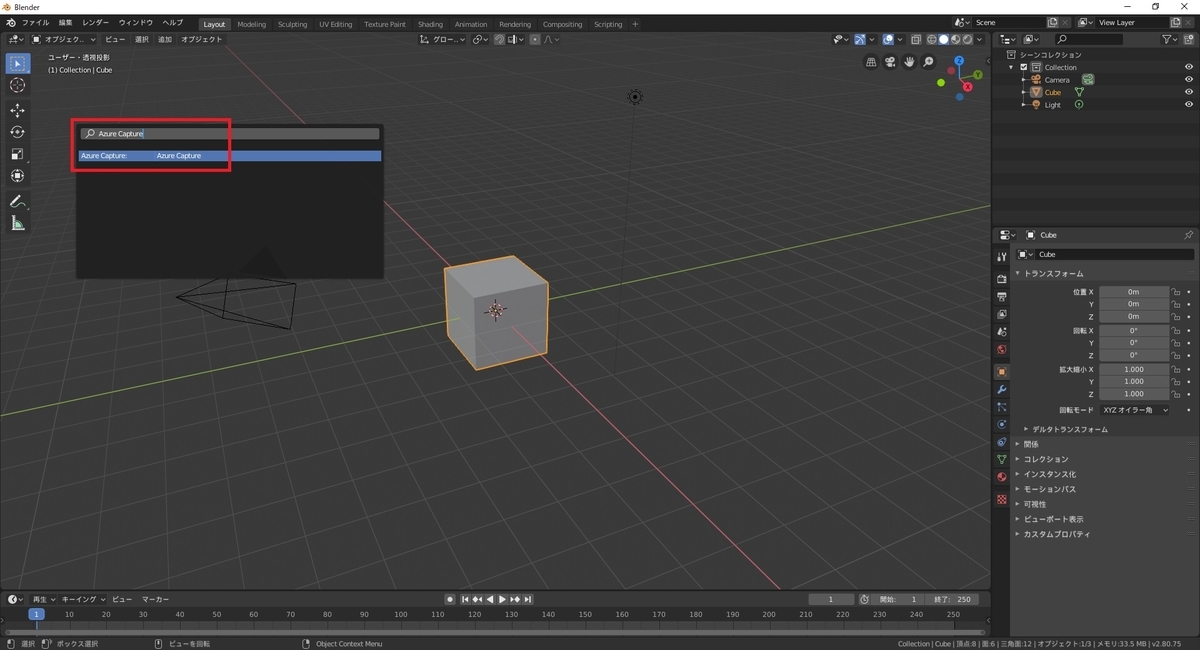
bl_label で設定した Azure Capture 文字を検索します。
関数が表示されれば、登録できています。
モジュールの利用
試しに以下のスクリプトを実行し、登録関数を Blender 内で呼び出してみます。
import bpy
#  kinect_capture モジュールのテスト利用
bpy.ops.azure_capture.execute()

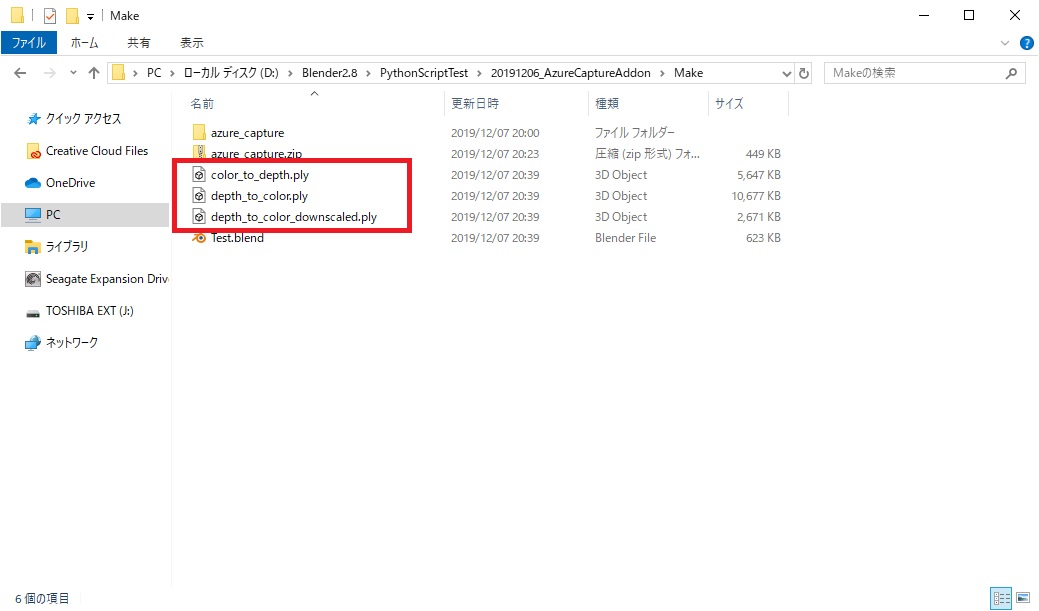
実行が成功すると、*.blend の保存ディレクトリに kinect_capture モジュールでキャプチャした *.ply ファイルが出力されます。
参考ページ
自作アドオンの作成手順や作成ルールについては以下に詳しく記事にしています。こちらも参照ください。
bluebirdofoz.hatenablog.com
