本日はチュートリアルの実施枠です。
Academyの「MR and Azure 303: Natural language understanding (LUIS)」の実施内容をまとめます。
docs.microsoft.com
前回記事の続きです。
bluebirdofoz.hatenablog.com
今回は「Chapter 3 ~ 4」です。
Chapter 3:Set up the Unity project
チュートリアルページではプロジェクトの基本的な設定項目について全て手動で行っています。
これらの設定項目は MRTK を利用すれば自動で設定可能です。本記事では MRTK を利用します。
以下の手順ページの「HoloLens(WindowsMR) プロジェクトの基本設定」までを実施したプロジェクトを作成します。
bluebirdofoz.hatenablog.com
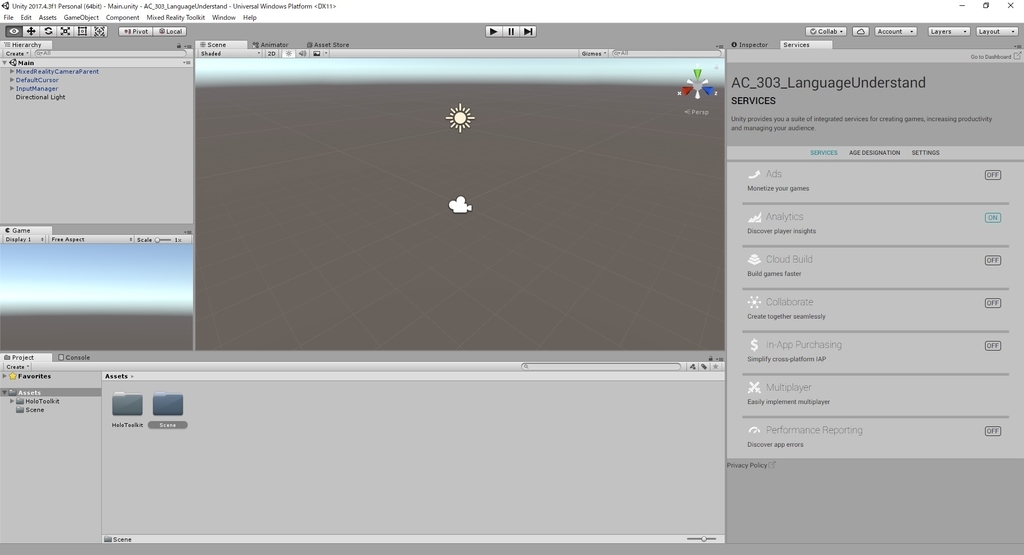
InternetClient と Microphone の利用が必要なため、capabilites の設定を行います。
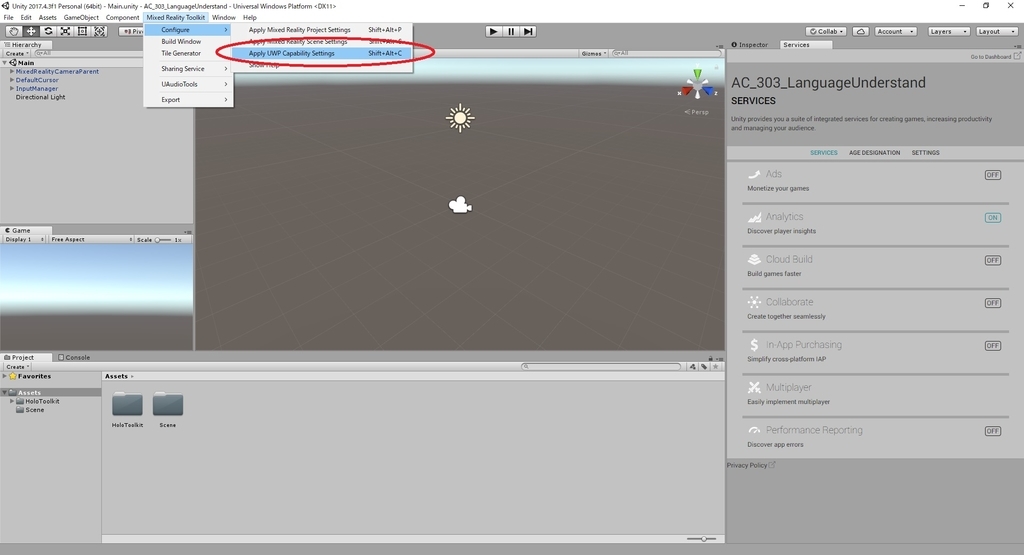
メニューから Mixed Reality Toolkit -> Configure -> Apply UWP Capability Settings を開きます。
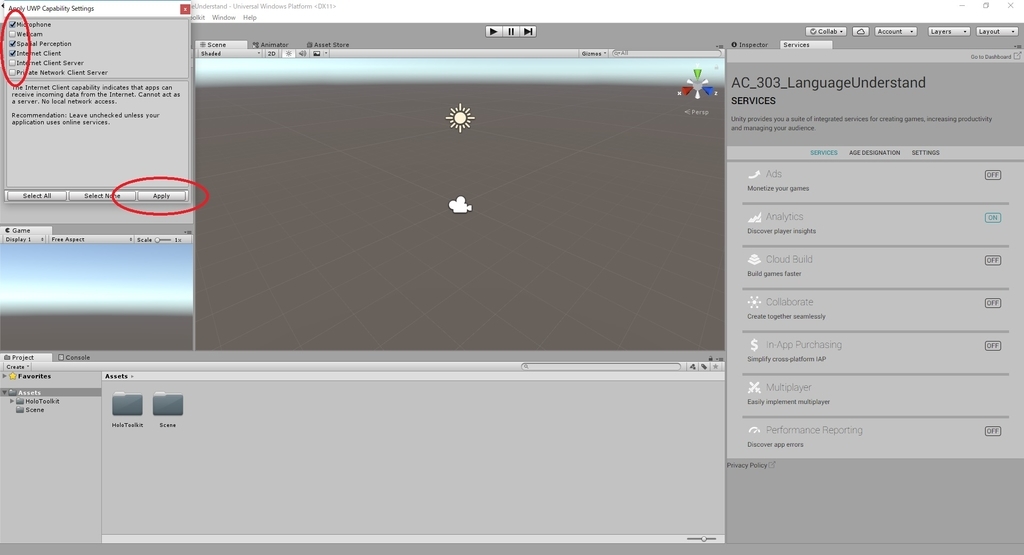
「Apply UWP Capability Settings」ダイアログが開くので、「InternetClient」と「Microphone」にチェックを入れて「Apply」を実行します。
Chapter 4:Create the scene
この手順ではシーンを作成します。
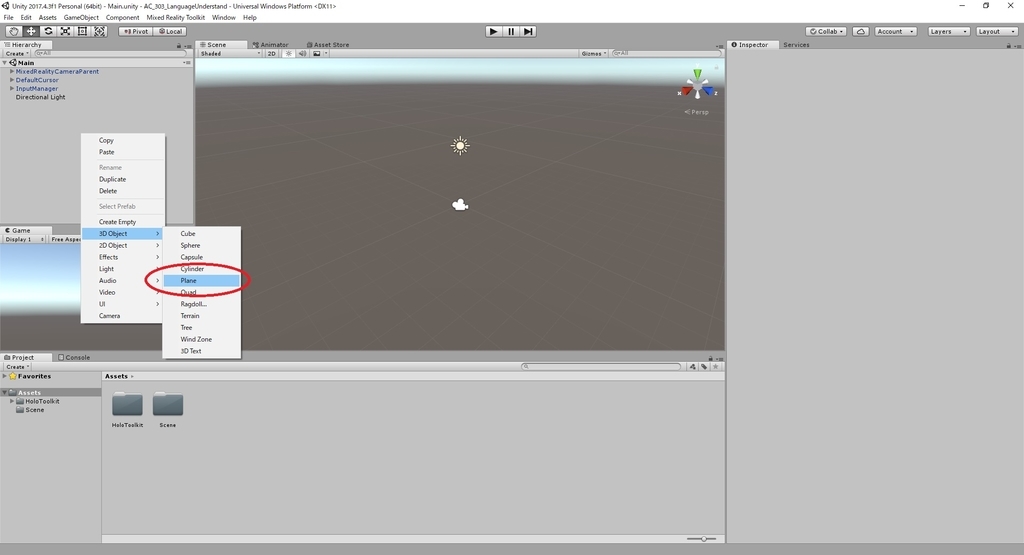
1.Hierarchy パネル内の空の領域を右クリックします。
3D Object -> Plane を選択して Plane オブジェクトを追加します。
2~3.同じ手順を繰り返して Hierarchy パネル内の空の領域に以下のオブジェクトを追加します。
・Sphere
・Cylinder
・Cube
・3DText
4.結果、Hierarchy パネル内が以下のようになっていることを確認します。
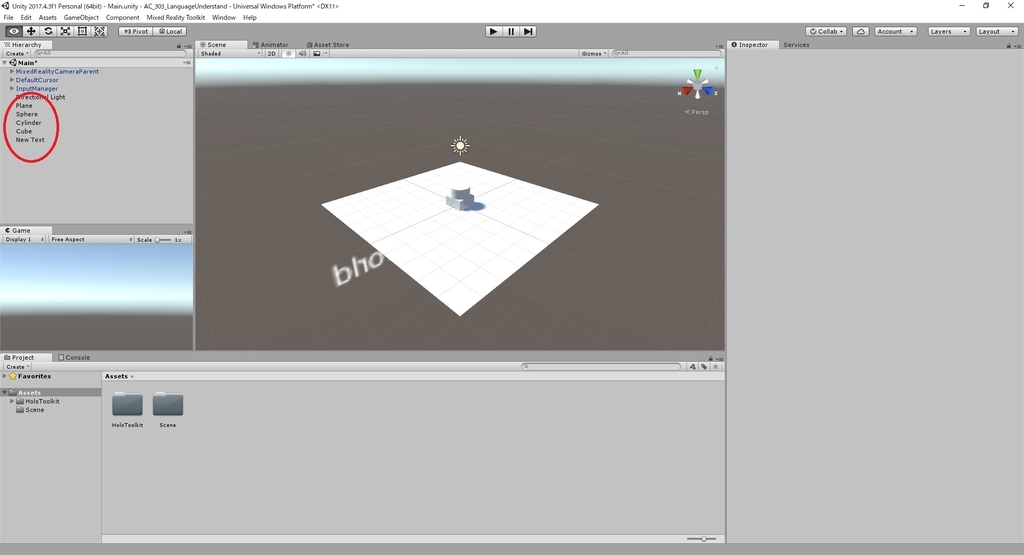
5.Hierarchy パネルの MixedRealityCameraParent を開き、MixedRealityCamera を選択します。
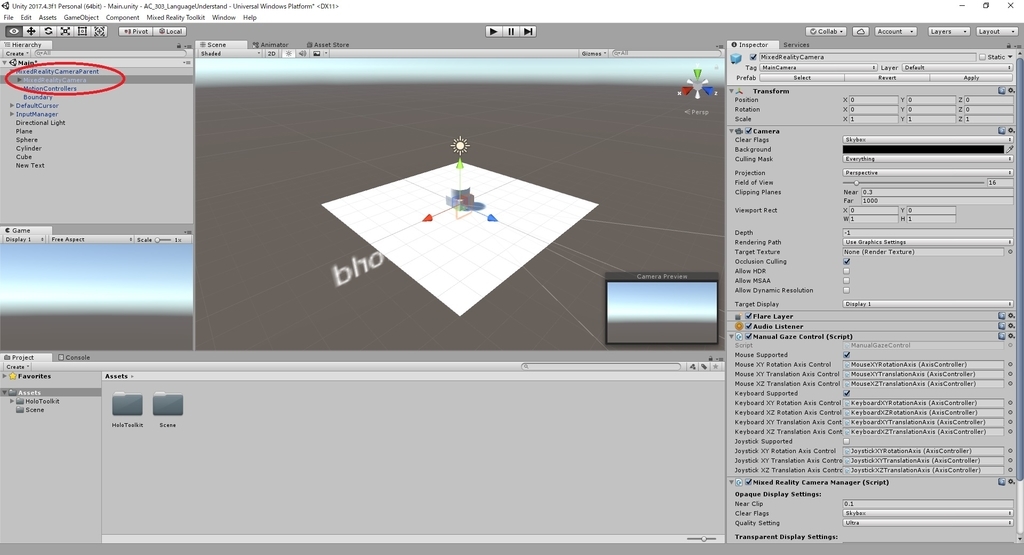
6~8.Inspector パネルを開き、一番下にある[Add Component]ボタンをクリックします。
Audio Sourceというコンポーネントを検索し、追加します。

9.シーンに追加した Plane オブジェクトを選択します。
Inspector パネルの設定で Transform コンポーネントの設定値を以下の通り変更します。
Position X:0   Y:-1  Z:0
Rotation X:0   Y:0   Z:0
Scale    X:1   Y:1   Z:1
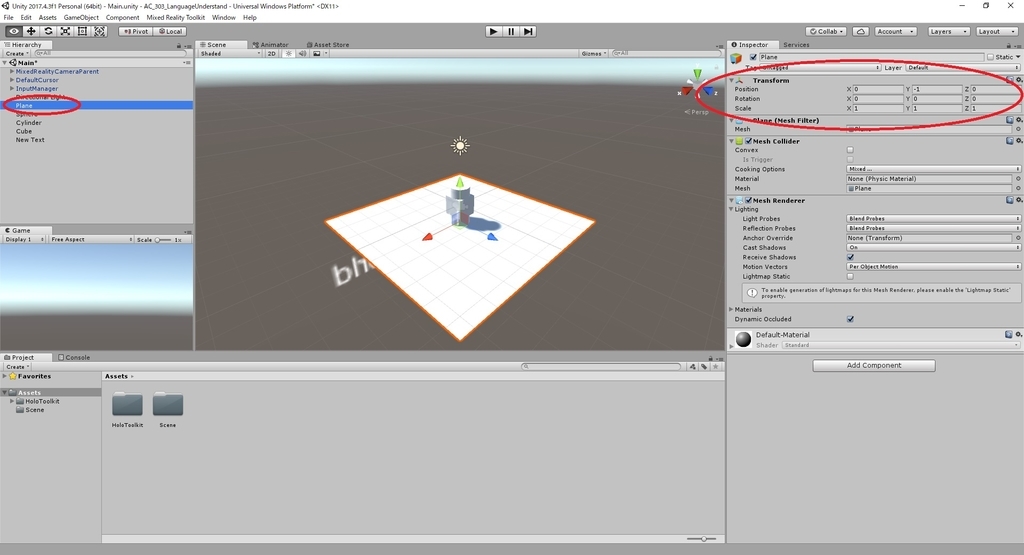
10.シーンに追加した Sphere オブジェクトを選択します。
Inspector パネルの設定で Transform コンポーネントの設定値を以下の通り変更します。
Position X:2   Y:1   Z:2
Rotation X:0   Y:0   Z:0
Scale    X:1   Y:1   Z:1
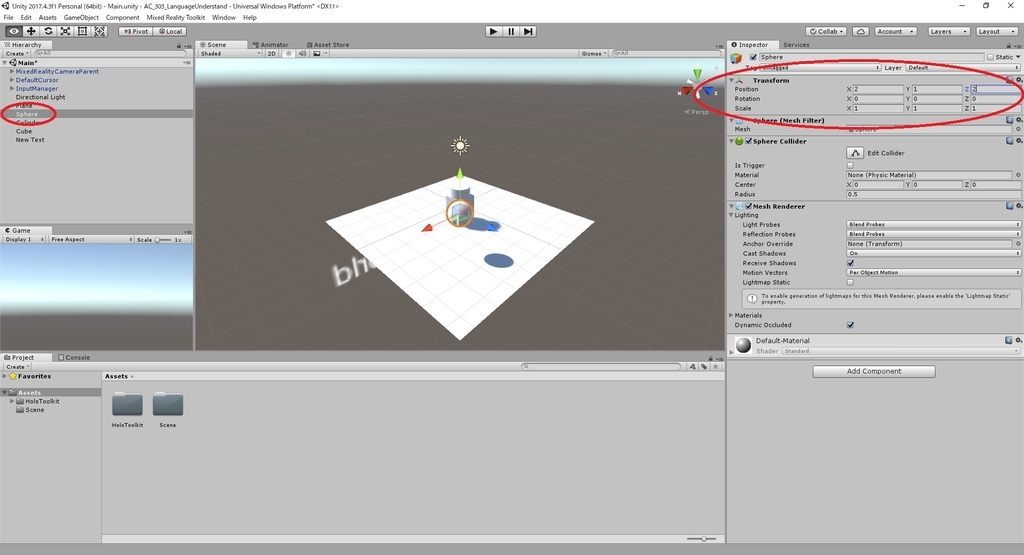
11.シーンに追加した Cylinder オブジェクトを選択します。
Inspector パネルの設定で Transform コンポーネントの設定値を以下の通り変更します。
Position X:-2  Y:1   Z:2
Rotation X:0   Y:0   Z:0
Scale    X:1   Y:1   Z:1

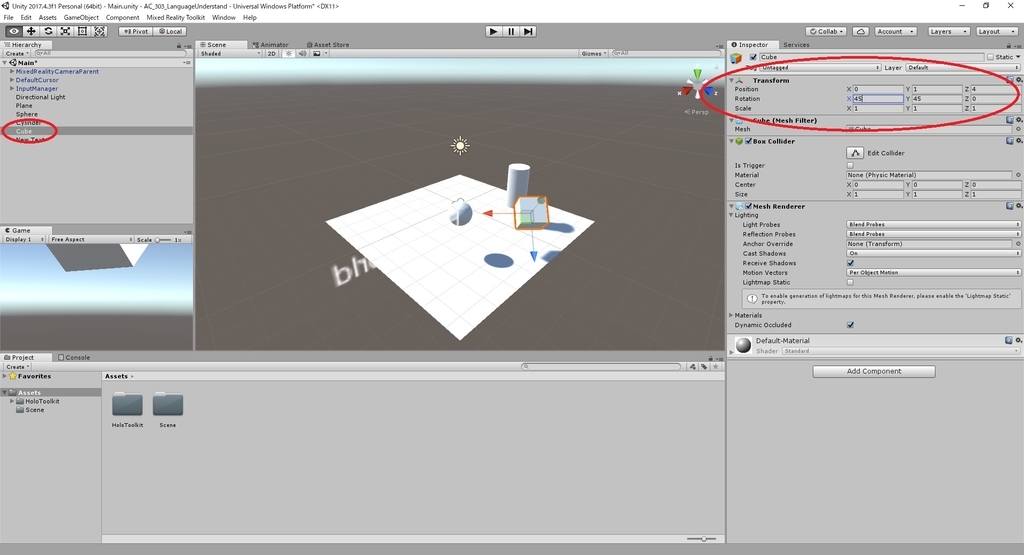
12.シーンに追加した Cube オブジェクトを選択します。
Inspector パネルの設定で Transform コンポーネントの設定値を以下の通り変更します。
Position X:0   Y:1   Z:4
Rotation X:45  Y:45  Z:0
Scale    X:1   Y:1   Z:1
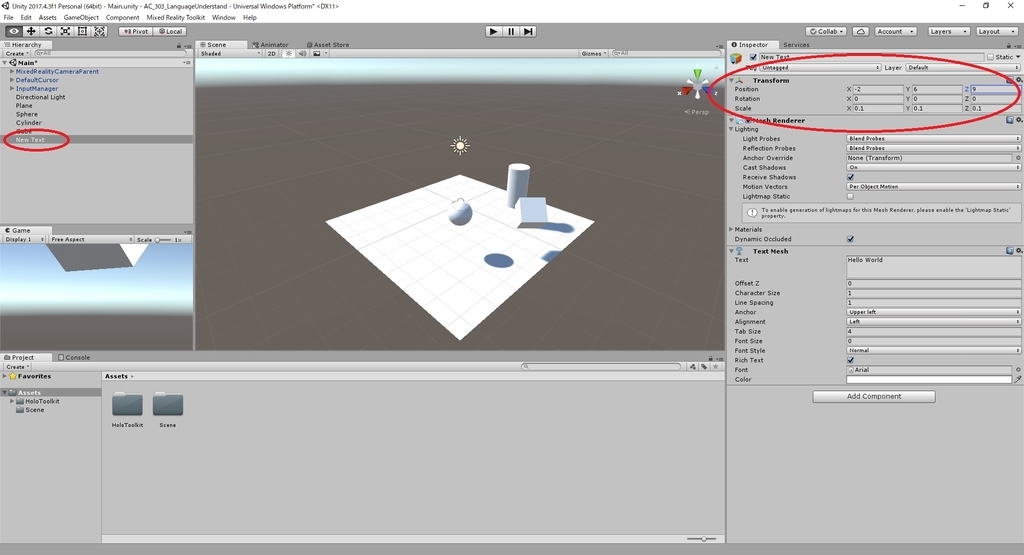
13.シーンに追加した NewText オブジェクトを選択します。
Inspector パネルの設定で Transform コンポーネントの設定値を以下の通り変更します。
Position X:-2  Y:6   Z:9
Rotation X:0   Y:0   Z:0
Scale    X:0.1 Y:0.1 Z:0.1
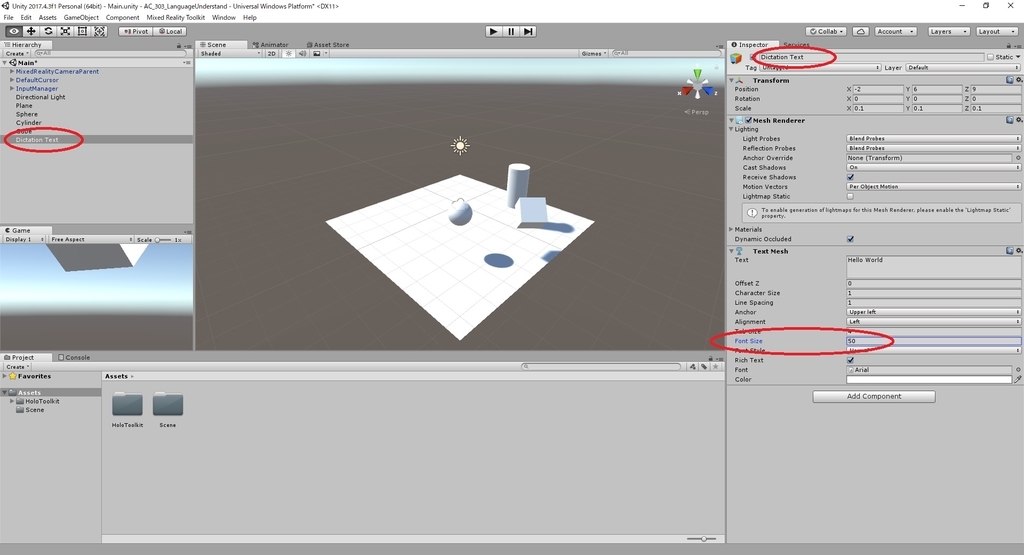
14~15:NewText オブジェクトは更に Inspector パネルの設定で以下の設定を行います。
オブジェクト名:Dictation Text
TextMesh -> Fontsize:50
16~17.最終的な Hierarchy パネルとシーンは以下のようになります。
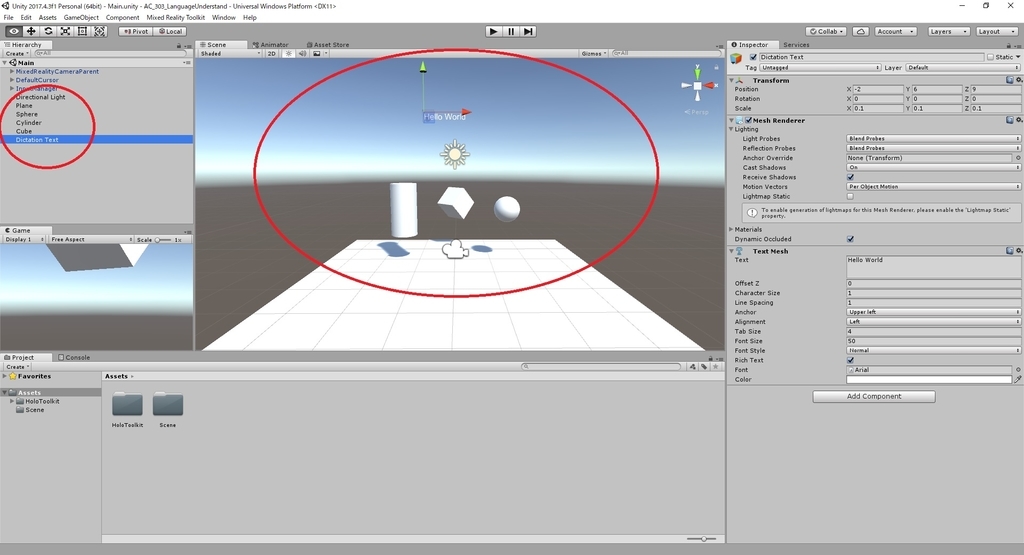
Chapter 4 はここまでです。
次回は Chapter 5 を実施します。
bluebirdofoz.hatenablog.com