本日はチュートリアルの実施枠です。
Academyの「MR and Azure 301: Language translation」の実施内容をまとめます。
docs.microsoft.com
前回記事の続きです。
bluebirdofoz.hatenablog.com
今回は「Chapter 2 ~ Chapter 4」です。
Chapter 2:Set up the Unity project
Chapter 3:Main Camera setup
チュートリアルページではプロジェクトの基本的な設定項目について全て手動で行っています。
これらの設定項目は MRTK を利用すれば自動で設定可能です。本記事では MRTK を利用します。
以下の手順ページの「HoloLens(WindowsMR) プロジェクトの基本設定」までを実施したプロジェクトを作成します。
bluebirdofoz.hatenablog.com

InternetClient と Microphone の利用が必要なため、capabilites の設定を行います。
メニューから Mixed Reality Toolkit -> Configure -> Apply UWP Capability Settings を開きます。

「Apply UWP Capability Settings」ダイアログが開くので、「InternetClient」と「Microphone」にチェックを入れて「Apply」を実行します。

Chapter 4:Setup Debug Canvas
翻訳の入力と出力を表示するには、基本的なUIを作成する必要があります。
データを表示するためのいくつかの Text オブジェクトを持つCanvas UIオブジェクトを作成します。
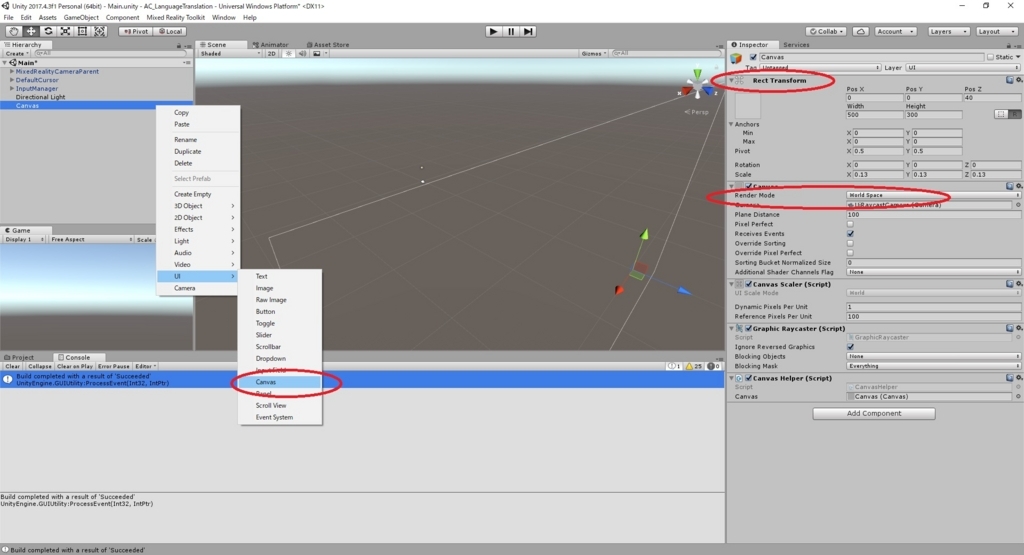
1.hierarchy パネルの空の領域を右クリックして、UI -> Canvas でキャンバスを追加します。
2.キャンバスオブジェクトを選択した状態で、Inspector パネルを開き、「RenderMode」を「WorldSpace」に変更します。
3.次に、Inspector パネルの Rect Transform で次のパラメータを変更します。
Pos-X:0,Y:0,Z:40
Width:500
Height:300
Scale-X:0.13,Y:0.13,Z:0.13

4.作成したキャンバスを右クリックして、UI -> Panel でパネルオブジェクトを追加します。
このパネルは、シーンに表示されるテキストの背景を提供します。
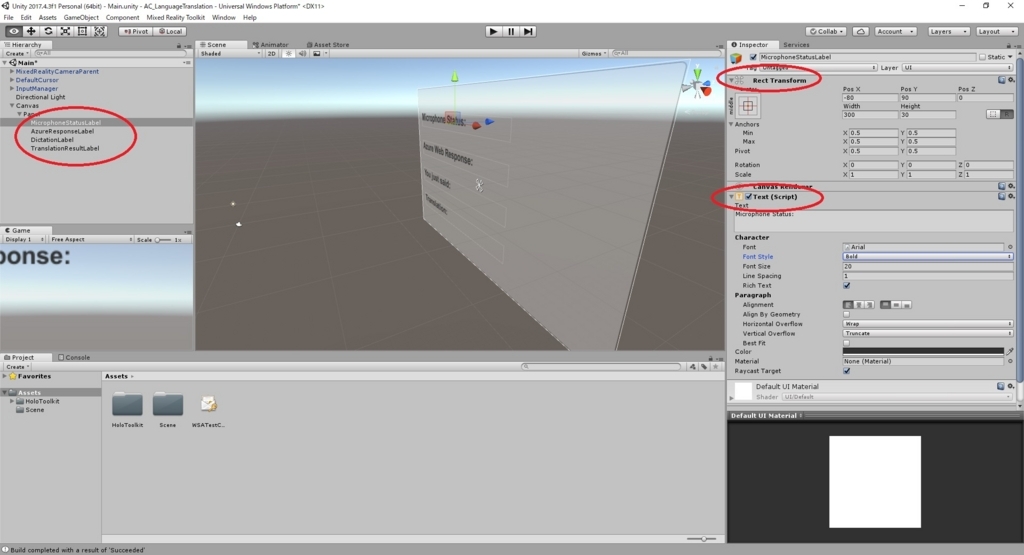
5.更に、作成したパネルを右クリックして、UI -> Text でテキストオブジェクトを追加します。
これを繰り返し、4つのテキストオブジェクトを作成します。

6.各テキストオブジェクトの Inspector パネルを開き、それぞれ以下の通り設定します。
・RefTransformコンポーネント
| Name | Transform-Position | Width | Height |
|---|---|---|---|
| MicrophoneStatusLabel | X:-80,Y:90,Z:0 | 300 | 30 |
| AzureResponseLabel | X:-80,Y:30,Z:0 | 300 | 30 |
| DictationLabel | X:-80,Y:-30,Z:0 | 300 | 30 |
| TranslationResultLabel | X:-80,Y:-90,Z:0 | 300 | 30 |
| Name | Text | FontSize | FontStyle |
|---|---|---|---|
| MicrophoneStatusLabel | Microphone Status: | 20 | Bold |
| AzureResponseLabel | Azure Web Response: | 20 | Bold |
| DictationLabel | You just said: | 20 | Bold |
| TranslationResultLabel | Translation: | 20 | Bold |

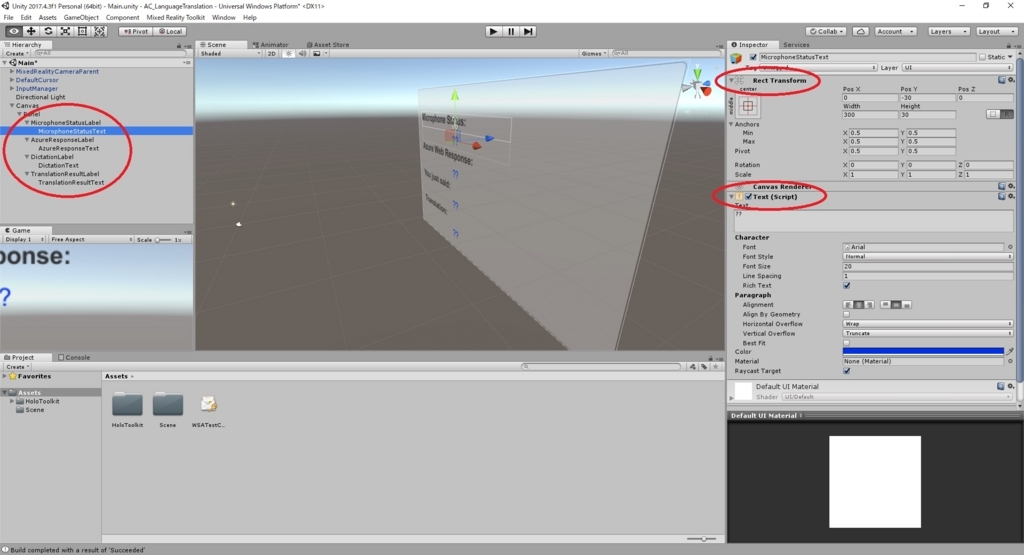
7.更にこれらの各テキストオブジェクトに対して、子オブジェクトのテキストオブジェクトを作成します。
これらはアプリケーションの出力を表示します。
8.各テキストオブジェクトの Inspector パネルを開き、それぞれ以下の通り設定します。
・RefTransformコンポーネント
| Name | Transform-Position | Width | Height |
|---|---|---|---|
| MicrophoneStatusText | X:0,Y:-30,Z:0 | 300 | 30 |
| AzureResponseText | X:0,Y:-30,Z:0 | 300 | 30 |
| DictationText | X:0,Y:-30,Z:0 | 300 | 30 |
| TranslationResultText | X:0,Y:-30,Z:0 | 300 | 30 |
| Name | Text | FontSize | Alignment | Color |
|---|---|---|---|---|
| MicrophoneStatusText | ?? | 20 | Center | 0032EAFF |
| AzureResponseText | ?? | 20 | Center | 0032EAFF |
| DictationText | ?? | 20 | Center | 0032EAFF |
| TranslationResultText | ?? | 20 | Center | 0032EAFF |

Chapter 4 はここまでです。
次回は Chapter 5 を実施します。
bluebirdofoz.hatenablog.com