本日はチュートリアルの実施枠です。
Academyの「MR and Azure 305: Functions and storage」の実施内容をまとめます。
docs.microsoft.com
前回記事の続きです。
bluebirdofoz.hatenablog.com
今回は「Chapter 3 ~ Chapter 5」です。
Chapter 3:Set up the Unity project
Chapter 4:Main Camera setup
チュートリアルページではプロジェクトの基本的な設定項目について全て手動で行っています。
これらの設定項目は MRTK を利用すれば自動で設定可能です。
本記事では Chapter 3 と Chapter 5 を chapter 4 より先に、MRTK を利用して設定します。
以下の手順ページの「HoloLens(WindowsMR) プロジェクトの基本設定」までを実施したプロジェクトを作成します。
bluebirdofoz.hatenablog.com
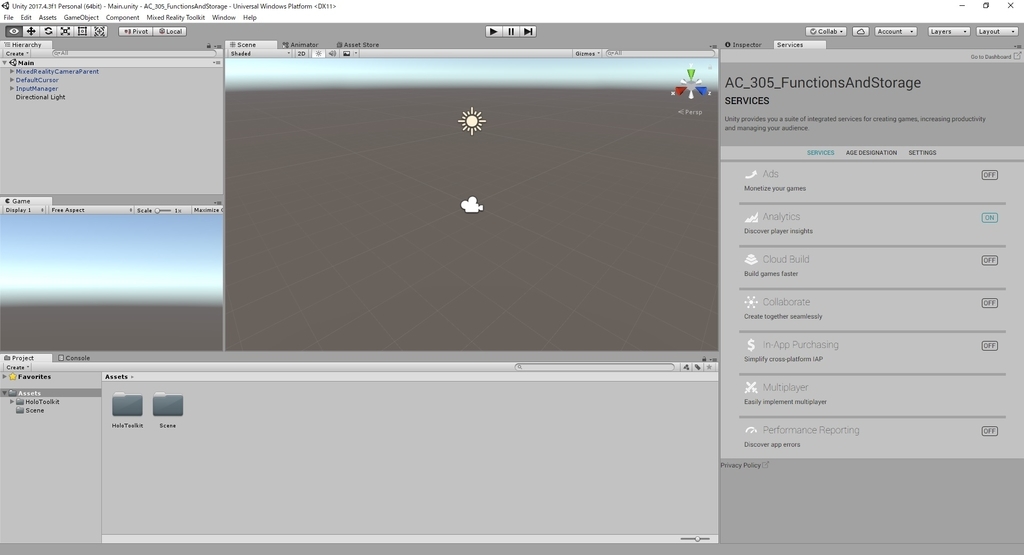
InternetClient の利用が必要なため、capabilites の設定を行います。
メニューから Mixed Reality Toolkit -> Configure -> Apply UWP Capability Settings を開きます。
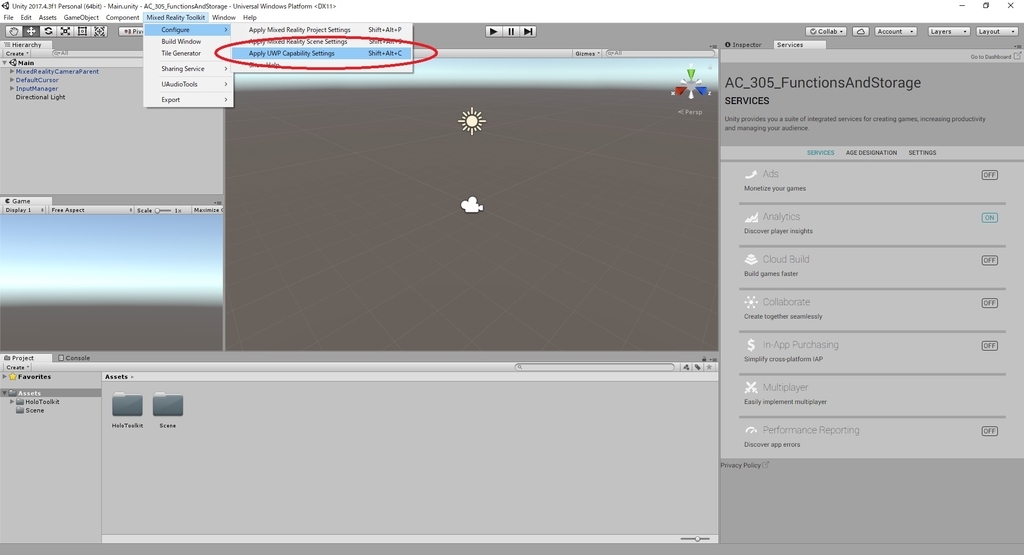
「Apply UWP Capability Settings」ダイアログが開くので、「InternetClient」にチェックを入れて「Apply」を実行します。

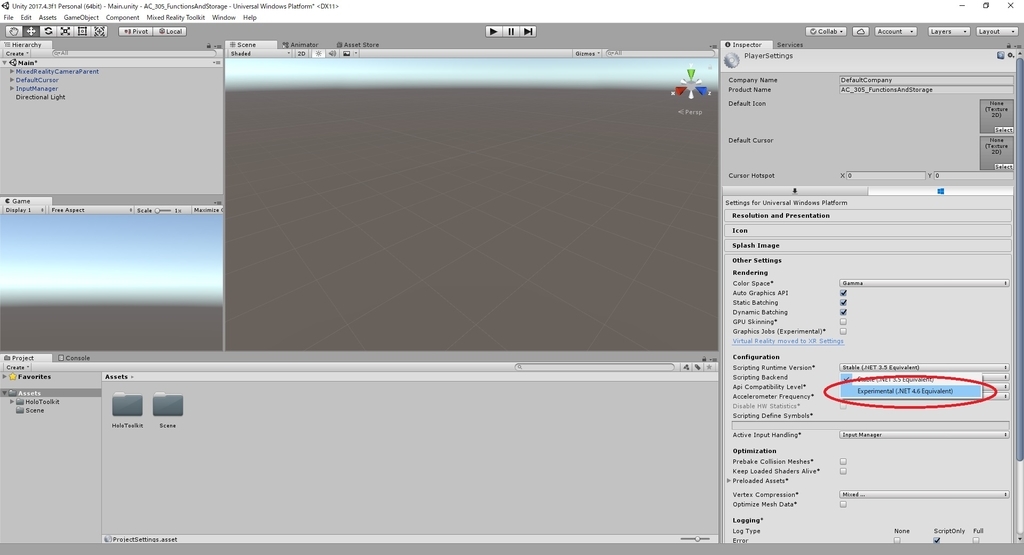
Scripting Runtime Version を Experimental(.NET 4.6相当)にする必要があります。
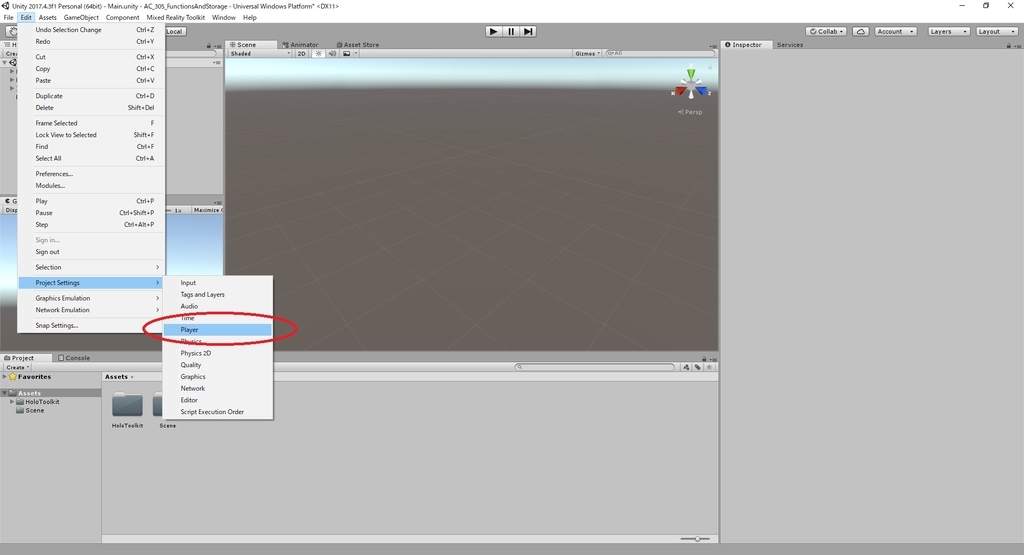
メニューから Edit -> Project Settings -> Player を開きます。
Inspector パネルから Other Settings を開き、Scripting Runtime Version の設定を Experimental(.NET 4.6 Equivalent) に変更します。
Chapter 5:Setting up the Unity scene
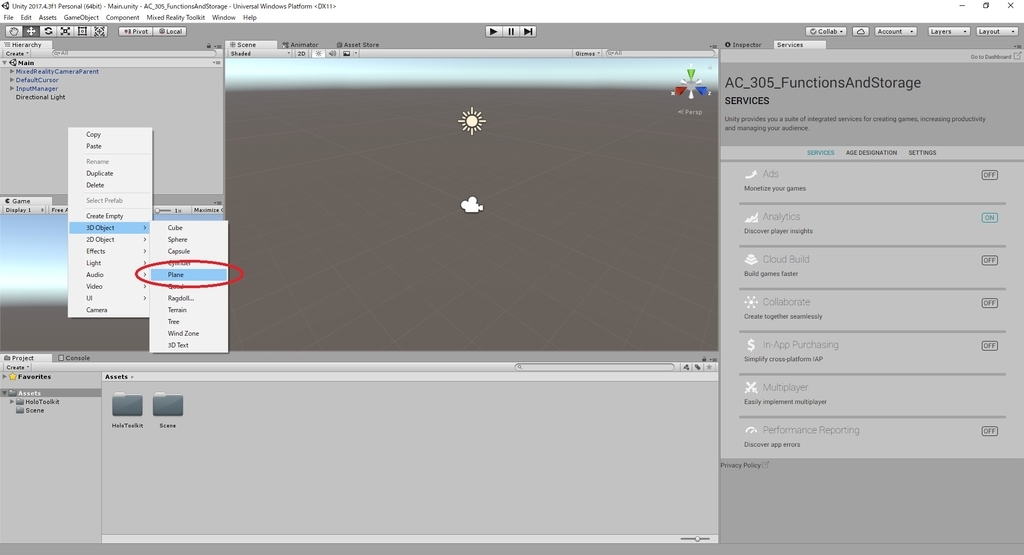
1.Hierarchy パネルの空の領域を右クリックし、3D Object -> Plane を追加します。
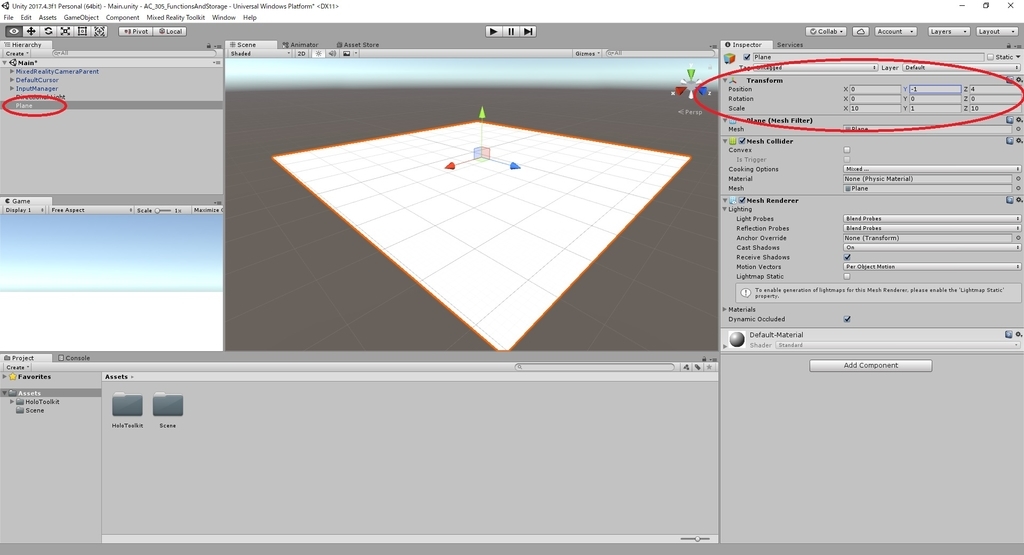
2.追加した Plane オブジェクトの Transform コンポーネントを以下の通り変更します。
Position X:0   Y:-1  Z:4
Rotation X:0   Y:0   Z:0
Scale    X:10  Y:1   Z:10
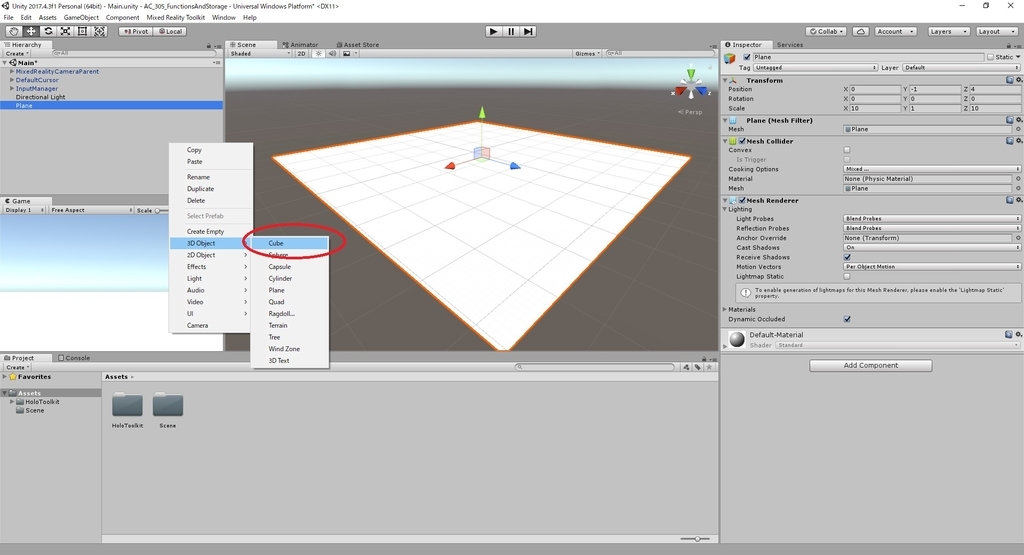
3.Hierarchy パネルの空の領域を右クリックし、3D Object -> Cube を追加します。
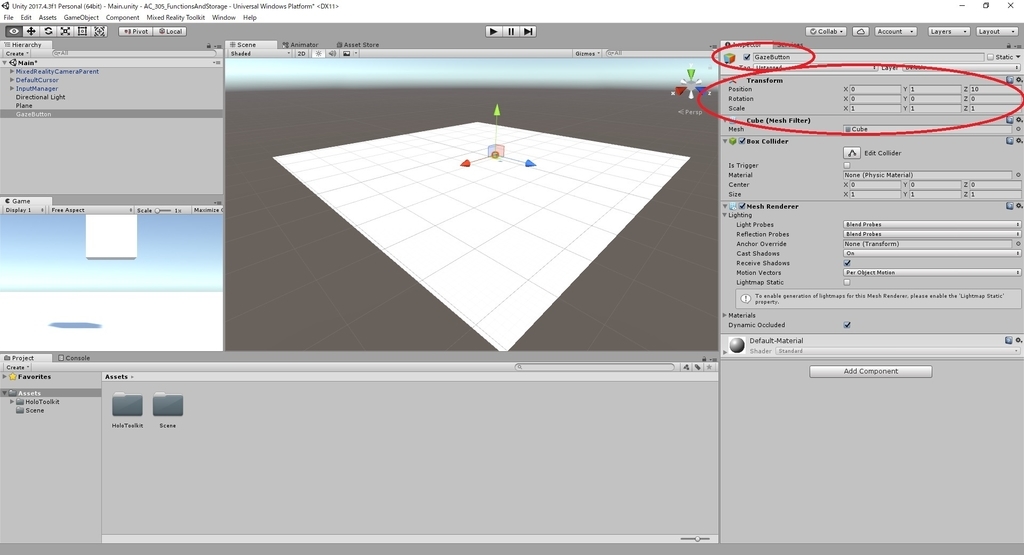
以下の通り設定を行います。
a.キューブの名前を GazeButton に変更します。
b.Transform コンポーネントを以下の通り変更します。
Position X:0 Y:1 Z:10
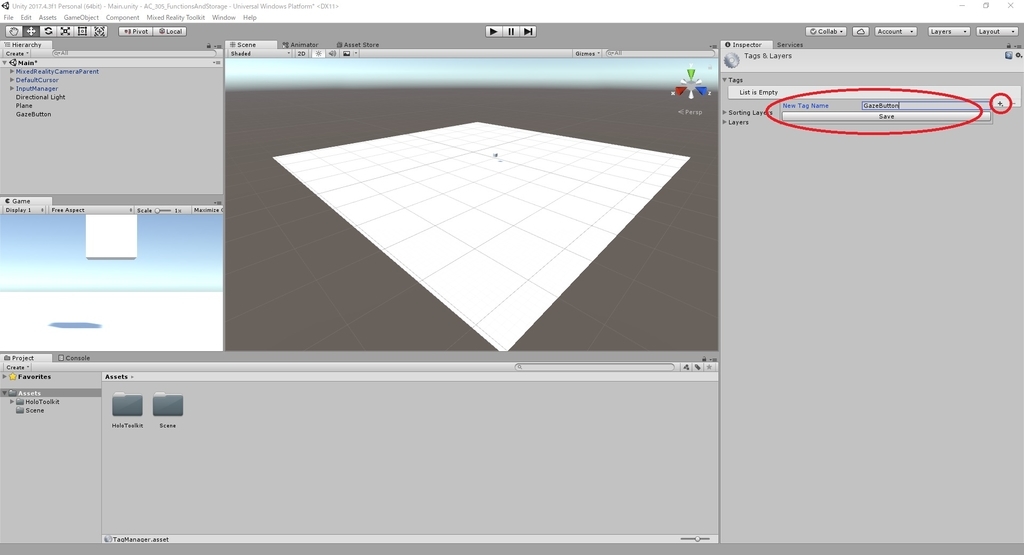
c.[Tag]ドロップダウンをクリックし、[Add Tag]をクリックします。

d.[Tags & Layers]ペインが開きます。
[+](プラス)ボタンを選択し、[New Tag Name]フィールドに GazeButton と入力し、[Save]を押します。
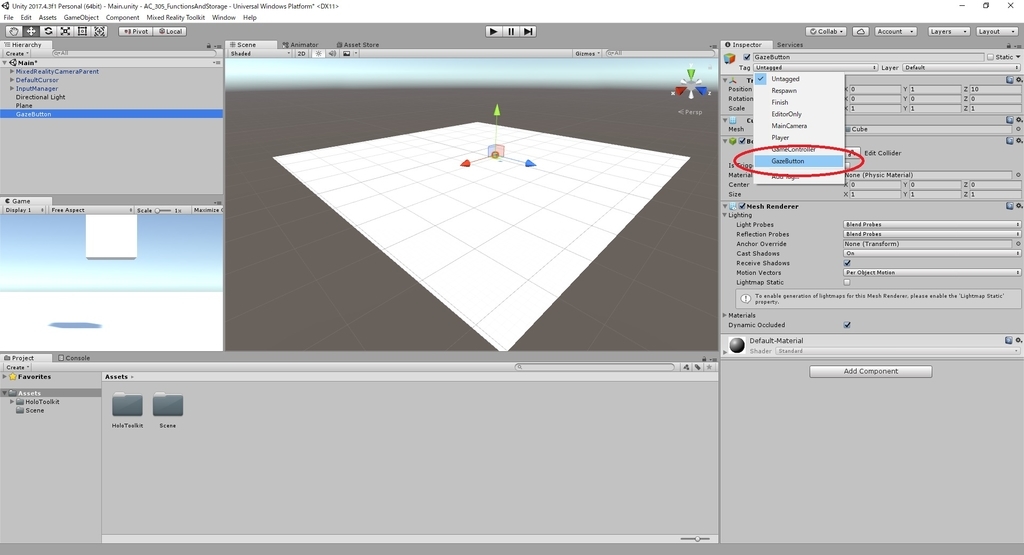
e.再び GazeButton オブジェクトの[Tag]ドロップダウンをクリックし、新しく作成した GazeButton タグを割り当てます。
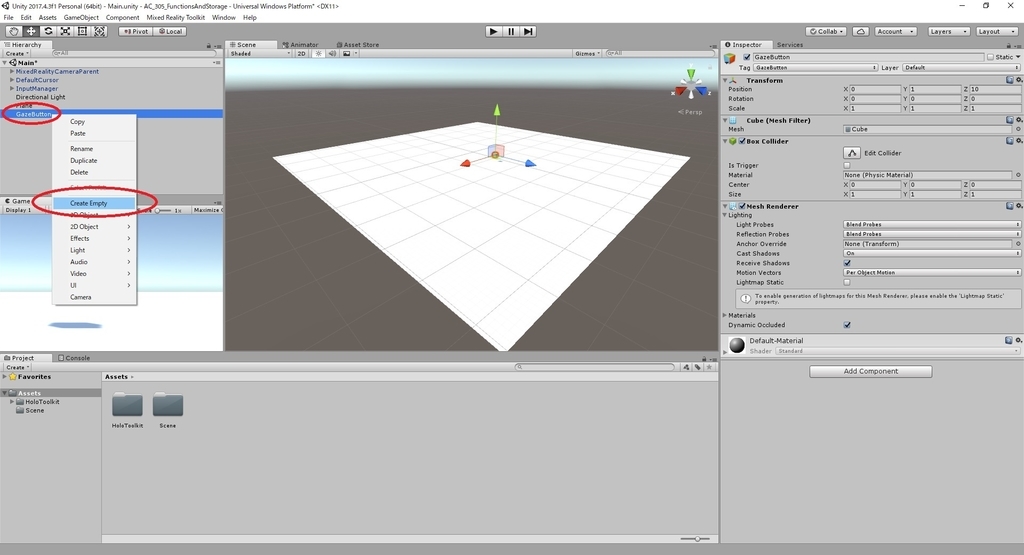
4.Hierarchy パネルの GazeButton オブジェクトを右クリックし、Create Empty を追加します。
これは GazeButton オブジェクトの子オブジェクトとして追加されます。
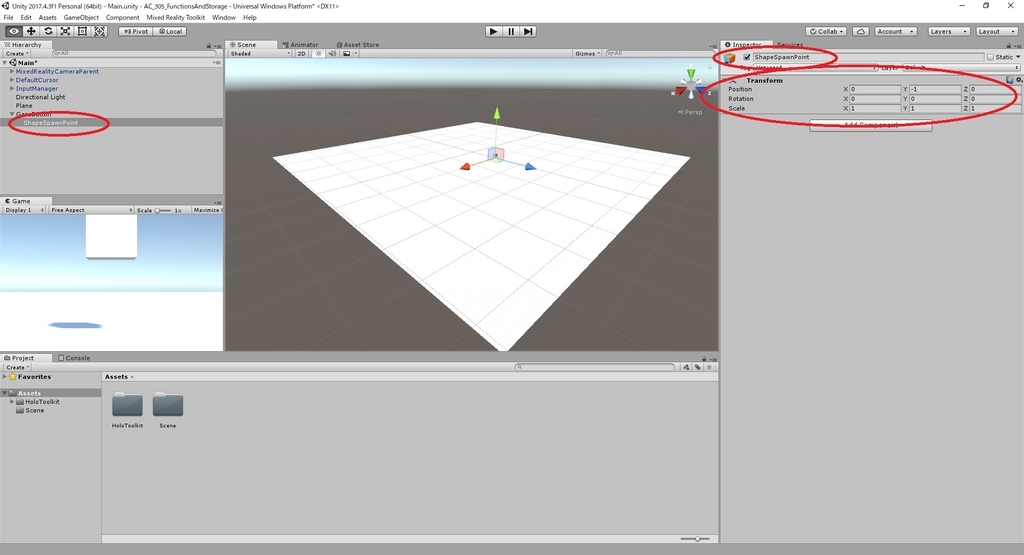
5.作成したオブジェクトに以下の通り設定を行います。
a.名前を ShapeSpawnPoint に変更します。
b.Transform コンポーネントを以下の通り変更します。
Position X:0 Y:-1 Z:0
6.次に、3D Text オブジェクトを作成して、Azure サービスのステータスに関するフィードバックを提供します。
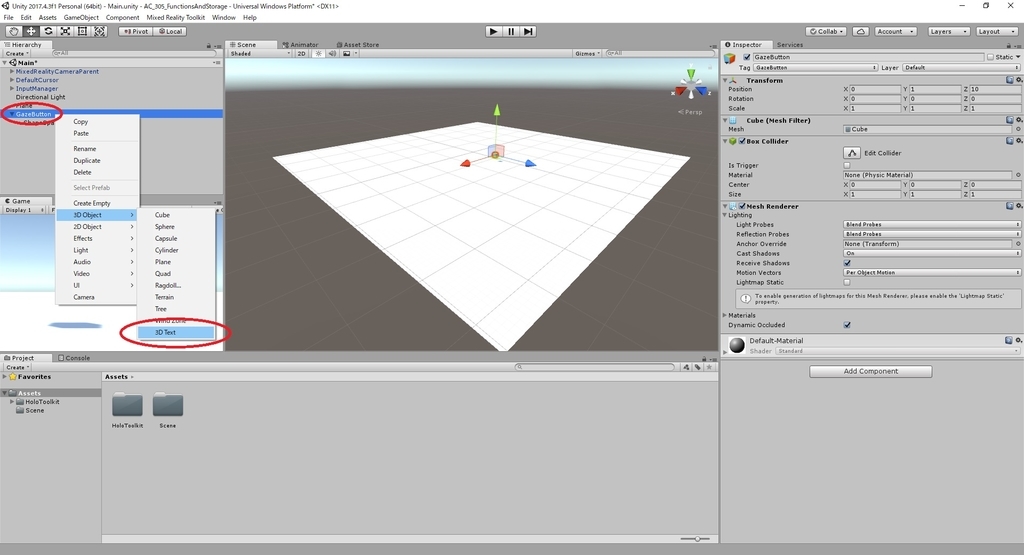
Hierarchy パネルの GazeButton を再度右クリックし、3D Object -> 3D Text を子として追加します。
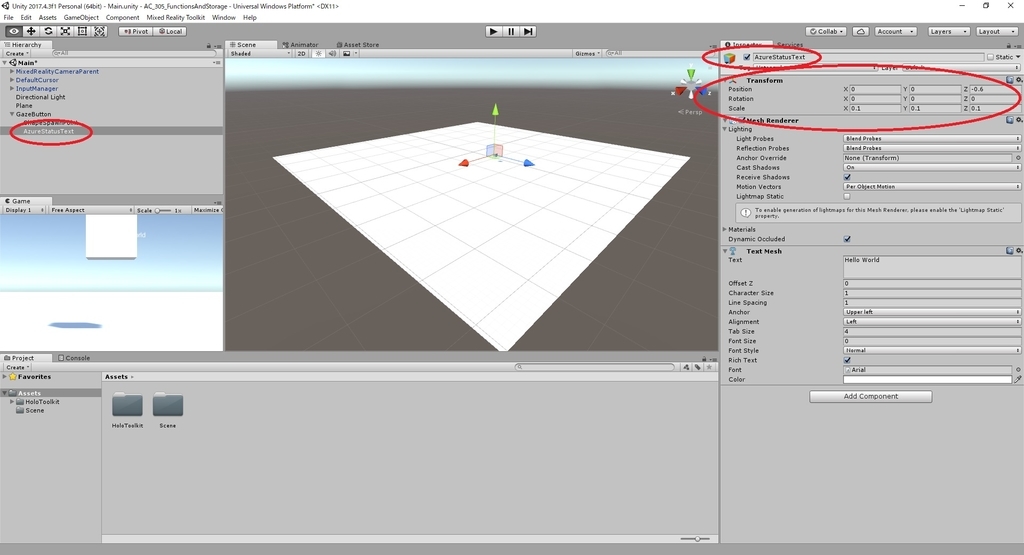
7.3D Textオブジェクトの名前を AzureStatusText に変更します。
8.AzureStatusText オブジェクトの Transform コンポーネントを次のように設定します。
Position X:0   Y:0   Z:-0.6
Rotation X:0   Y:0   Z:0
Scale    X:0.1 Y:0.1 Z:0.1
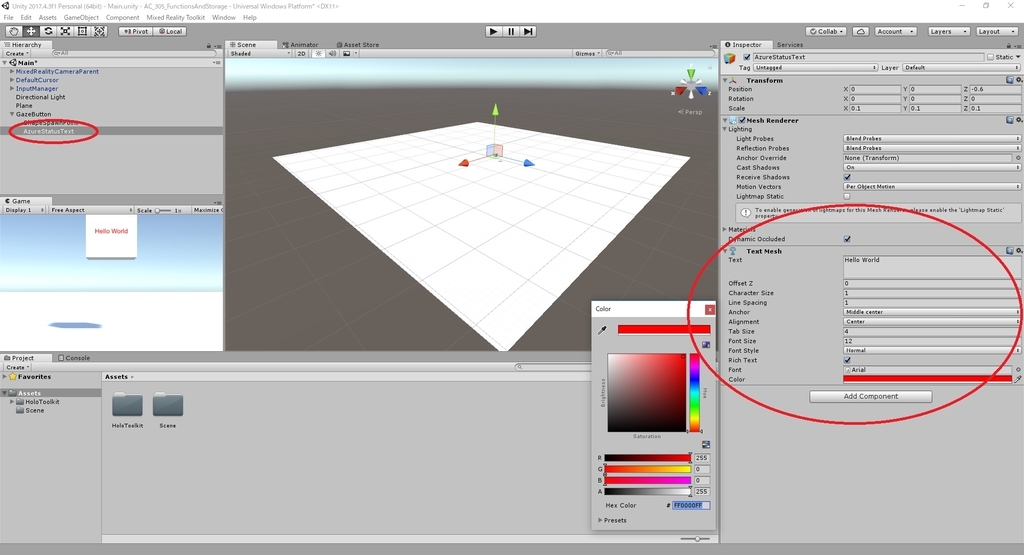
9.Text Meshコンポーネントを次のように変更します。
Anchor:Middle center
Alignment:Center
FontSize:12
Color:FF0000FF
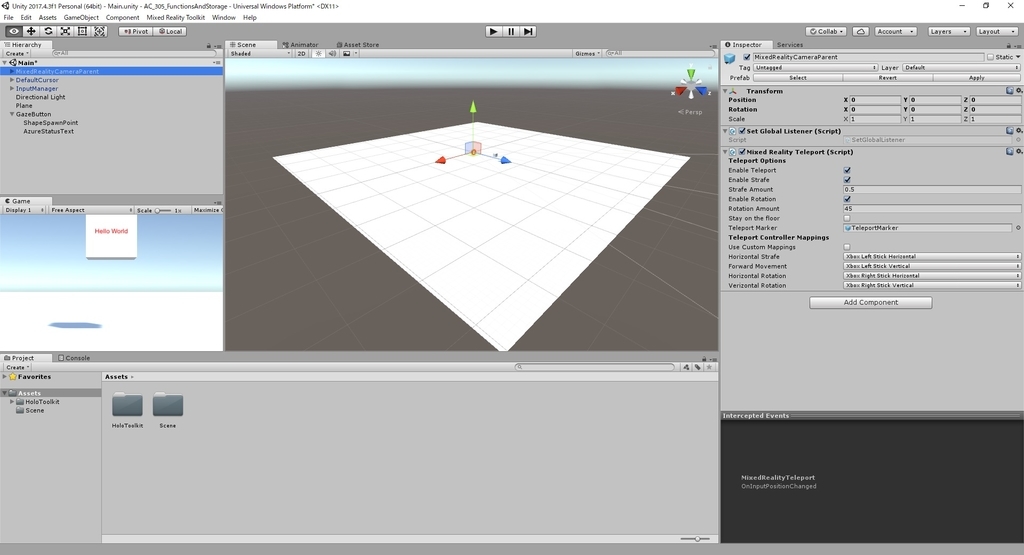
10-11.最終的に Hierarchy パネルの構造とシーンは以下のようになります。
Chapter 3 ~ 5 はここまでです。
次回は Chapter 6 を実施します。
bluebirdofoz.hatenablog.com