本日は Blender2.8 の python 利用の技術調査枠です。
Blender2.8でUIパネルに自作のプロパティを追加する方法を記事にします。

前回記事の続きになります。
bluebirdofoz.hatenablog.com
プロパティの作成
UIパネルで自作のプロパティを利用する場合、スクリプトでプロパティの定義を行う必要があります。
bpy.types.PropertyGroup を継承してプロパティを作成します。
今回は int の変数を一つだけ持つ以下の簡易なプロパティを用意します。
class MyIntPropertyGroup(bpy.types.PropertyGroup):
    myint : bpy.props.IntProperty(
        name="testint_name",   # 変数名
        description="",        # 説明文
        default=1,             # デフォルト値
        min=1,                 # 最小値
        max=10,                # 最大値
    )
定義したプロパティは Blender の型に変数を追加して登録します。
今回は、以下のようにクラスの登録と解除の箇所で、変数の追加も同時に行うようにしました。
# 変数の追加
def register():
    bpy.types.Scene.myintproperty = bpy.props.PointerProperty(type=MyIntPropertyGroup)

# 変数の削除
def unregister():
    del bpy.types.Scene.myintproperty
追加したプロパティは以下のように context からアクセスできるようになります。
props = context.scene.myintproperty
UIパネルへの組み込み
このプロパティをUIパネルに組み込みます。
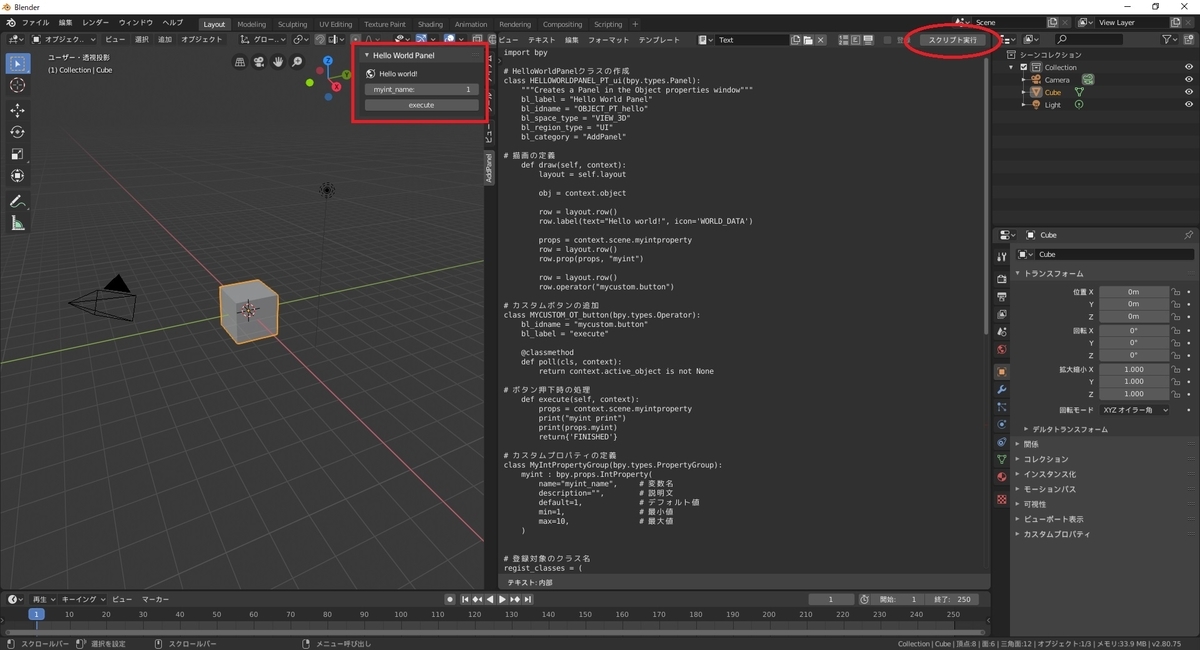
パネルにプロパティの値を入力して実行ボタンを押すと、設定した値がプリント出力されるUIを追加しました。
・PanelTest_IntProperty.py
import bpy

# HelloWorldPanelクラスの作成
class HELLOWORLDPANEL_PT_ui(bpy.types.Panel):
    bl_label = "Hello World Panel"
    bl_idname = "OBJECT_PT_hello"
    bl_space_type = "VIEW_3D"
    bl_region_type = "UI"
    bl_category = "AddPanel"

# 描画の定義
    def draw(self, context):
        layout = self.layout

        obj = context.object

        row = layout.row()
        row.label(text="Hello world!", icon='WORLD_DATA')

        props = context.scene.myintproperty
        row = layout.row()
        row.prop(props, "myint")

        row = layout.row()
        row.operator("mycustom.button")

# カスタムボタンの追加
class MYCUSTOM_OT_button(bpy.types.Operator):
    bl_idname = "mycustom.button"
    bl_label = "execute"

    @classmethod
    def poll(cls, context):
        return context.active_object is not None

# ボタン押下時の処理
    def execute(self, context):
        props = context.scene.myintproperty
        print("myint print")
        print(props.myint)
        return{'FINISHED'}

# カスタムプロパティの定義
class MyIntPropertyGroup(bpy.types.PropertyGroup):
    myint : bpy.props.IntProperty(
        name="myint_name",     # 変数名
        description="",        # 説明文
        default=1,             # デフォルト値
        min=1,                 # 最小値
        max=10,                # 最大値
    )


# 登録対象のクラス名
regist_classes = (
    HELLOWORLDPANEL_PT_ui,
    MYCUSTOM_OT_button,
    MyIntPropertyGroup
)

# HelloWorldPanelの登録
def register():
    for regist_cls in regist_classes:
        bpy.utils.register_class(regist_cls)
    bpy.types.Scene.myintproperty = bpy.props.PointerProperty(type=MyIntPropertyGroup)

# HelloWorldPanelの解除
def unregister():
    for regist_cls in regist_classes:
        bpy.utils.unregister_class(regist_cls)
    del bpy.types.Scene.myintproperty

# 実行例:[HelloWorldPanelの登録]を実施
if __name__ == "__main__":
    register()

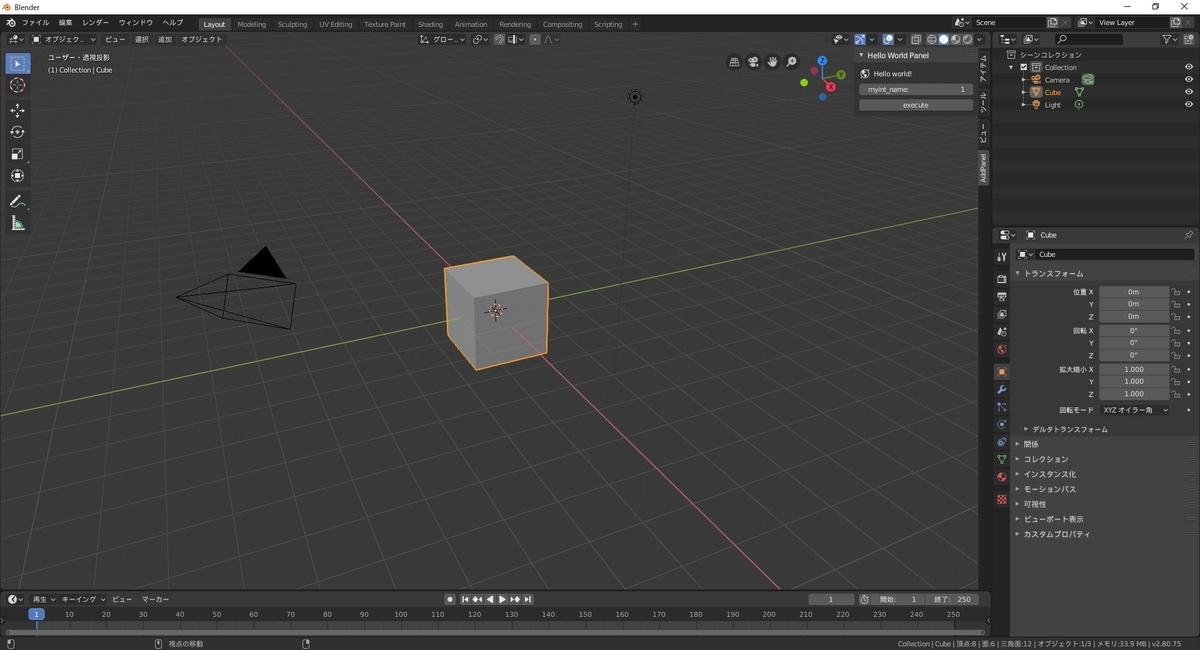
スクリプトを実行すると、myint のプロパティを持った HelloWorldPanel パネルが追加されます。

プリント出力を確認するため、メニューから ウィンドウ -> システムコンソール切替 で端末を開きます。

myint_name の値を変更して[execute]ボタンを押下すると、端末に設定した値が出力できました。

利用可能なプロパティ
利用可能なプロパティの型の種類は以下を参照ください。
docs.blender.org