本日は HoloLens2 の小ネタ枠です。
HoloLens2でスクリプトからホログラムを合成したビデオ録画を行う手順を記事にします。

VideoCapture
HoloLens でビデオを MP4 形式のファイルシステムに直接記録する API で公開しています。
VideoCapture を使用するには WebCam と Microphone の機能を有効にする必要があります。
docs.unity3d.com
docs.unity3d.com
サンプルシーン
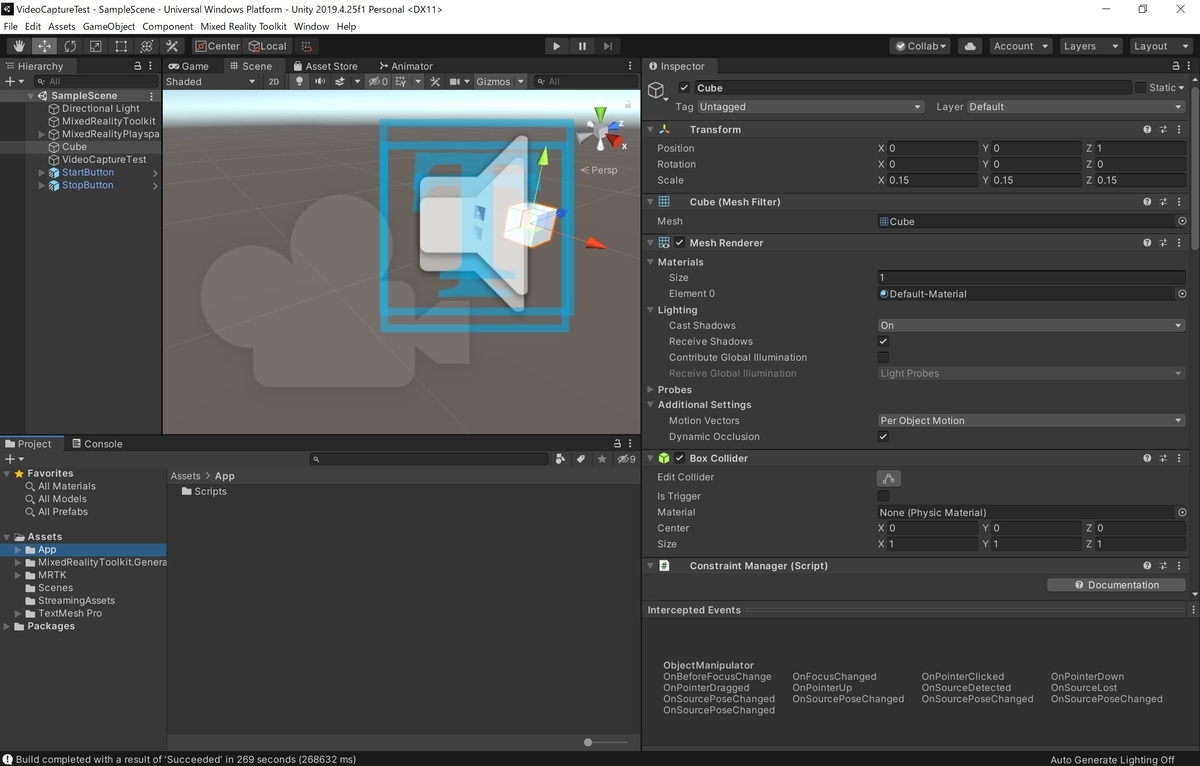
動作確認のため、以下のサンプルシーンを作成しました。
ホログラムが同時に録画されていることを確認するため、Cube オブジェクトを配置しています。
録画を行うための以下のスクリプトを作成しました。
StartVideoCaptureTest 関数で録画の開始、StopVideoCaptureTest 関数で録画を停止します。
・VideoCaptureTest.cs
using System.Collections;
using System.Collections.Generic;
using UnityEngine;
using System.Linq;
using UnityEngine.Windows.WebCam;

public class VideoCaptureTest : MonoBehaviour
{
    /// <summary>
    /// ビデオキャプチャの参照
    /// </summary>
    VideoCapture m_VideoCapture = null;

    /// <summary>
    /// カメラパラメータの参照
    /// </summary>
    CameraParameters m_CameraParameters;

    /// <summary>
    /// 開始時処理
    /// </summary>
    void Start()
    {
        // 録画解像度の取得
        Resolution cameraResolution = VideoCapture.SupportedResolutions.OrderByDescending((res) => res.width * res.height).First();
        Debug.Log(cameraResolution);

        // 録画フレームレートの取得
        float cameraFramerate = VideoCapture.GetSupportedFrameRatesForResolution(cameraResolution).OrderByDescending((fps) => fps).First();
        Debug.Log(cameraFramerate);

        // ホログラムの合成フラグ
        bool HologramFlg = true;

        // VideoCapture インスタンスの作成
        VideoCapture.CreateAsync(HologramFlg, delegate (VideoCapture videoCapture)
        {
            if (videoCapture != null)
            {
                m_VideoCapture = videoCapture;
                Debug.Log("Created VideoCapture Instance!");

                // カメラパラメータの設定
                CameraParameters cameraParameters = new CameraParameters();
                // キャプチャされたホログラムの不透明度(0.0 : 透明 ~ 1.0 : 不透明)
                cameraParameters.hologramOpacity = 1.0f;
                // ビデオをキャプチャするフレームレート
                cameraParameters.frameRate = cameraFramerate;
                // 幅の解像度
                cameraParameters.cameraResolutionWidth = cameraResolution.width;
                // 高さの解像度
                cameraParameters.cameraResolutionHeight = cameraResolution.height;
                // 記録に使用されるピクセル形式
                cameraParameters.pixelFormat = CapturePixelFormat.BGRA32;

                m_CameraParameters = cameraParameters;
            }
            else
            {
                Debug.LogError("Failed to create VideoCapture Instance!");
            }
        });
    }

    /// <summary>
    /// ビデオ録画の開始
    /// </summary>
    public void StartVideoCaptureTest()
    {
        if (m_VideoCapture != null)
        {
            if (!m_VideoCapture.IsRecording)
            {
                m_VideoCapture.StartVideoModeAsync(m_CameraParameters,
                    VideoCapture.AudioState.ApplicationAndMicAudio,
                    OnStartedVideoCaptureMode);
            }
            else
            {
                Debug.LogError("Aready Recording!");
            }
        }
        else
        {
            Debug.LogError("Failed to create VideoCapture Instance!");
        }
    }

    /// <summary>
    /// ビデオ録画の停止
    /// </summary>
    public void StopVideoCaptureTest()
    {
        // ビデオモードを非同期的に停止する
        m_VideoCapture.StopRecordingAsync(OnStoppedVideoCaptureMode);
    }

    /// <summary>
    /// ファイルシステムへのビデオ録画の記録を開始する
    /// </summary>
    /// <param name="result"></param>
    void OnStartedVideoCaptureMode(VideoCapture.VideoCaptureResult result)
    {
        Debug.Log("Started Video Capture Mode!");

        // タイムスタンプを元にファイル名を作成する
        string timeStamp = Time.time.ToString().Replace(".", "").Replace(":", "");
        string filename = string.Format("TestVideo_{0}.mp4", timeStamp);

        // ディレクトリの保存先を指定する
#if WINDOWS_UWP
        // HoloLens上での動作の場合、LocalAppData/AppName/LocalStateフォルダを参照する
        string filepath = System.IO.Path.Combine(Windows.Storage.ApplicationData.Current.LocalFolder.Path, filename);
#else
        // Unity上での動作の場合、Assets/StreamingAssetsフォルダを参照する
        string filepath = System.IO.Path.Combine(UnityEngine.Application.streamingAssetsPath, filename);
#endif
        filepath = filepath.Replace("/", @"\");

        // 書き出し先を指定してファイルシステムへのビデオ録画を非同期に開始する
        m_VideoCapture.StartRecordingAsync(filepath, OnStartedRecordingVideo);
    }

    /// <summary>
    /// 録画開始時のコールバック関数
    /// </summary>
    /// <param name="result"></param>
    void OnStartedRecordingVideo(VideoCapture.VideoCaptureResult result)
    {
        Debug.Log("Started Recording Video!");
    }

    /// <summary>
    /// ファイルシステムへのビデオ録画を停止する
    /// </summary>
    void OnStoppedVideoCaptureMode(VideoCapture.VideoCaptureResult result)
    {
        Debug.Log("Stopped Video Capture Mode!");
        // ファイルシステムへのビデオ録画を非同期に停止する
        m_VideoCapture.StopVideoModeAsync(OnStoppedRecordingVideo);
    }

    /// <summary>
    /// 録画終了時のコールバック関数
    /// </summary>
    void OnStoppedRecordingVideo(VideoCapture.VideoCaptureResult result)
    {
        Debug.Log("Stopped Recording Video!");
    }
}
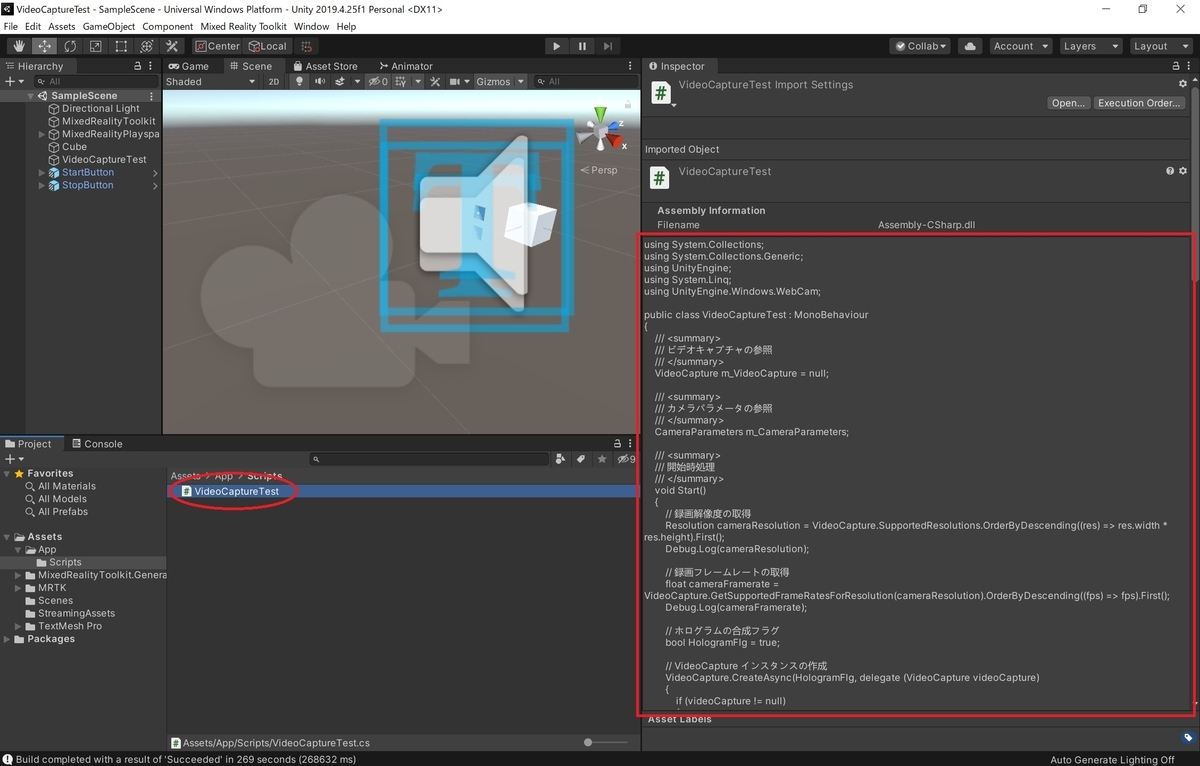
作成したスクリプトを適当なゲームオブジェクトにアタッチします。

ボタンの配置
ボタンオブジェクトを利用するため、Unity プロジェクトに MRTK をインポートします。
MRTK のインポート手順は以下の記事などを参考にしてください
bluebirdofoz.hatenablog.com
シーンにボタンを配置し、それぞれのイベントを開始/停止関数に割り当てました。


Capabilitiesの設定
録画を行うため、カメラとマイクの権限許可を行います。
メニューから[Edit -> Project Settings..]を開き、[Player]タブの[Publishing Settings]を開きます。
[Capabilities]の項目で[WebCam]と[Microphone]にチェックを入れます。

ホログラムの位置合わせ
デフォルト設定でカメラ映像とホログラムの合成を行うと、カメラ位置のズレにより、動画内でホログラムの位置ズレが発生します。
以下の設定を行うことで、ホログラムの位置ズレ修正することができます。
1. [Hierarchy]から[MixedRealityToolkit]オブジェクトを選択し、Inspector ビューを開きます。
2. MRTK のプロファイルから[Camera -> Camera Settings Providers -> Windows Mixed Reality Camera Settings]を開きます。
3. [Render from PV Camera]のチェックを入れます。

HoloLens2での動作確認
アプリを HoloLens2 にインストールして動作を確認します。

[Start]ボタンをクリックすると録画が開始されます。
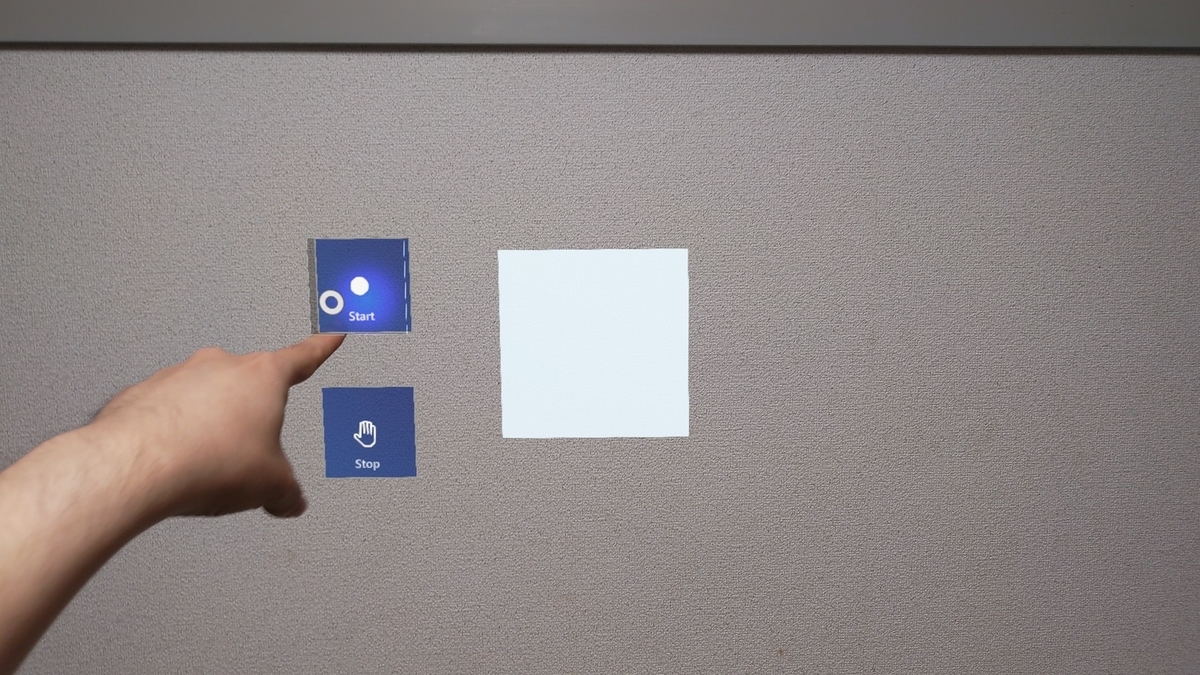
録画を停止する場合は[Stop]ボタンをクリックします。
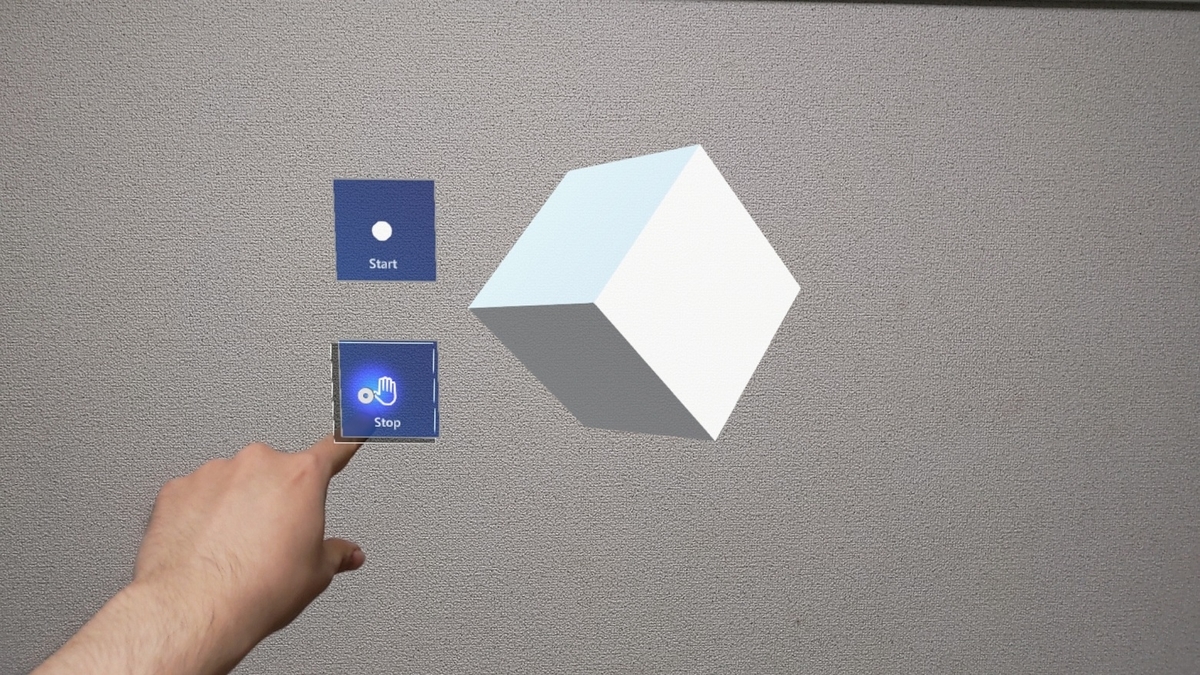
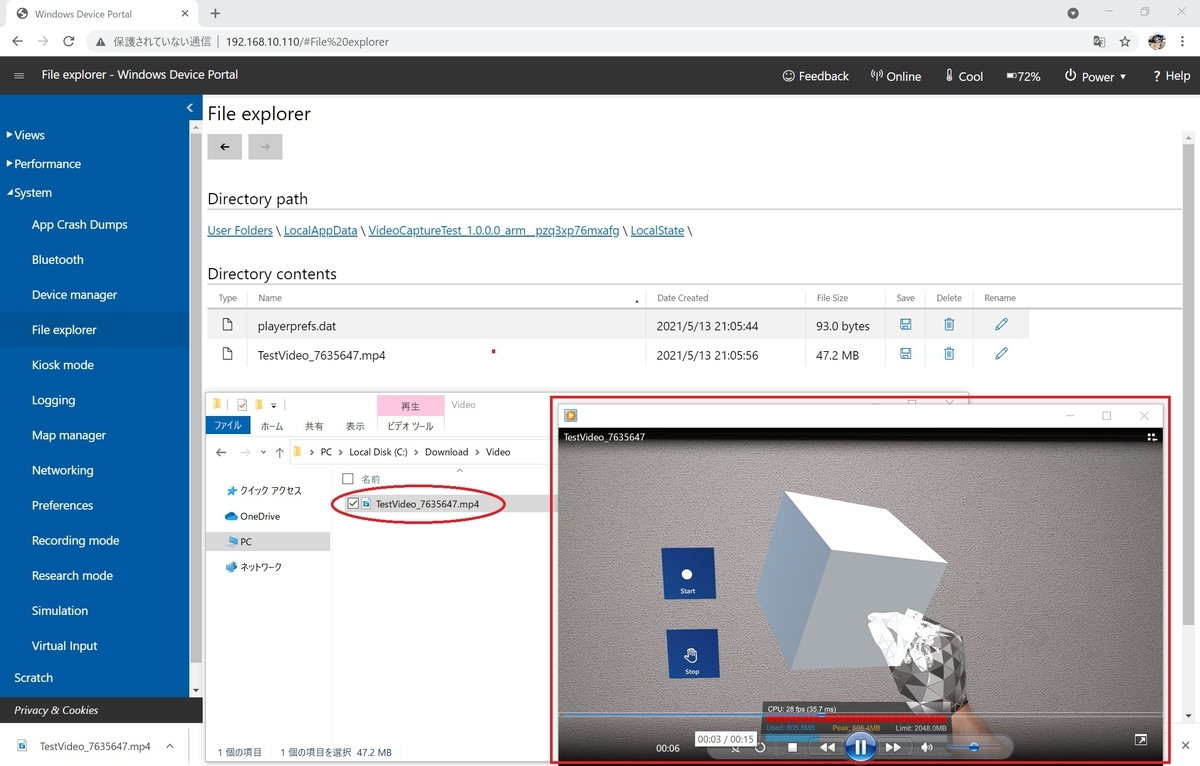
録画された結果はアプリケーションのローカルフォルダに保存されます。
DevicePortal のファイルエクスプローラからダウンロード可能です。

ダウンロードした動画を確認すると、ホログラムが映った動画が撮影できています。
